The Canon 80D is a fantastic camera, but it does not come set up optimized to produce the best photo, so I make some changes to the camera settings. Here are my top 5 settings to change in the Canon 80D.
Whenever you get a new camera, or there is a time change, or you are in a different time zone, make sure you set the time and date. This might not seem like a big deal, but it will save you a lot of time and frustration later. Image sharing websites and photo software use the time stamps to organize your photos. If these settings are wrong, you will have a head ache trying to organize the mess it creates.
Image Quality
Set the Image quality to save both Raw and JPEG if you are editing your photos later while also needing to quickly share your photos during the shoot.
However, there are situations where it makes sense to only save the RAW image. Because writing the second file to the SD Card takes extra buffer time and space, there might be occasions where you need to take photos more rapidly. Saving only the RAW image might give you an extra boost in the time between writing your current photo and the camera’s readiness to take the next.
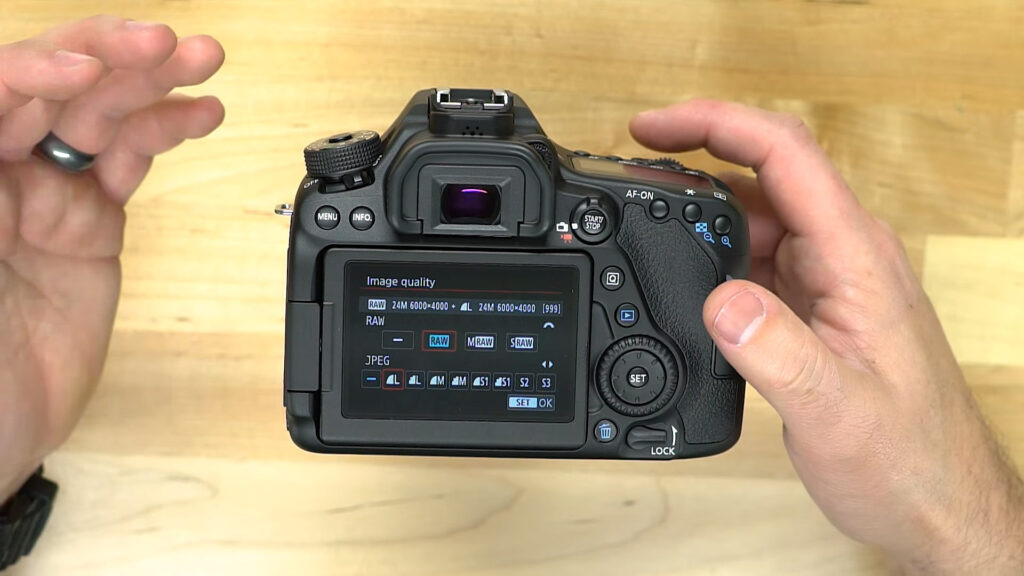
Go to the Photo Shooting Menu, scroll to Image quality and select Raw + JPEG or simply RAW depending on your situation.
Medium RAW is okay and is the minimum RAW setting I would ever suggest. If your SD Card is fast enough, just use RAW.
JPEG photos won’t take up a lot of storage space and are useful for sharing to social media. However, JPEG is a compressed image format.
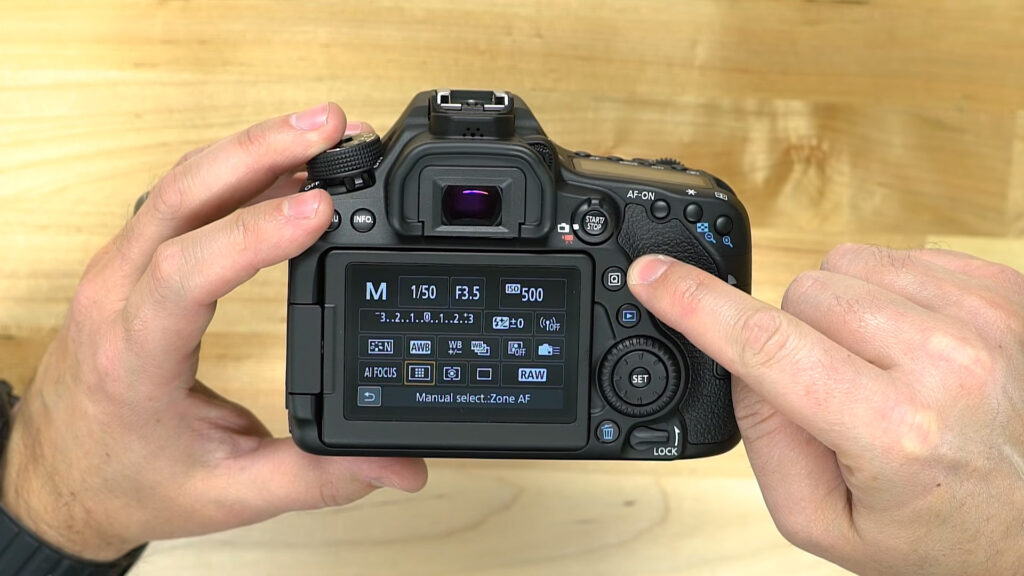
Auto Focus Settings
Tap the Q Button and change the default focus setting from One Shot to AI Focus.
One Shot: When you half press your shutter, this will maintain your set focus until you release it and half press it again.
AI Focus: This feature allows your camera’s focus to intelligently react to moving focal points while you are half pressing down the shutter. I find this mode super useful when photographing actively moving people at live events. For portraits and landscapes this mode will be problematic.
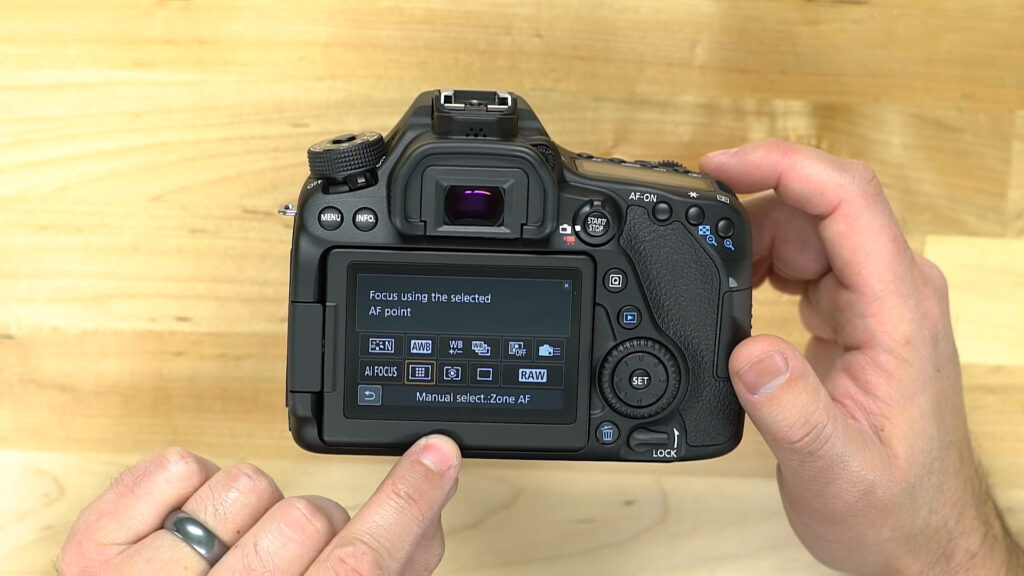
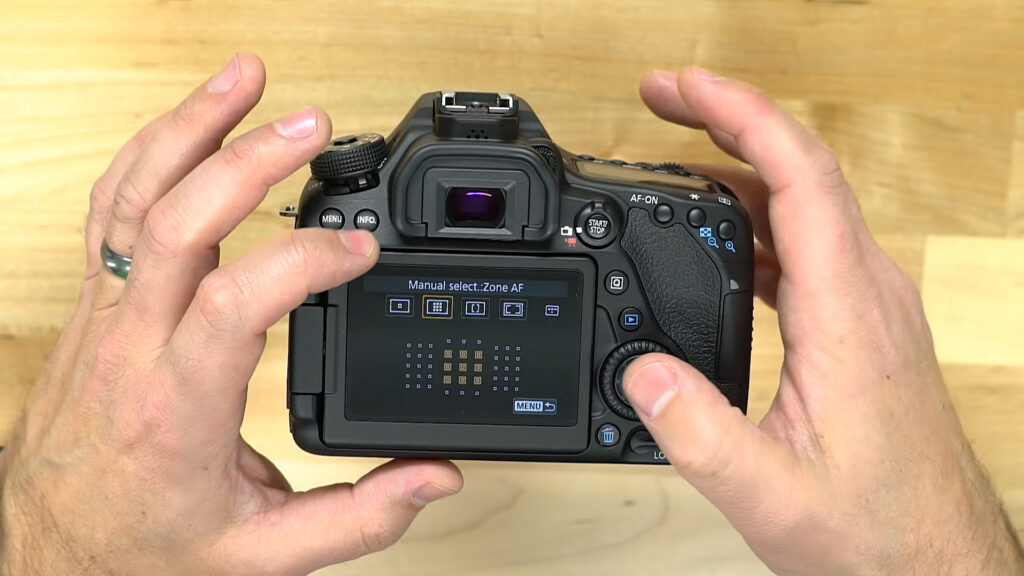
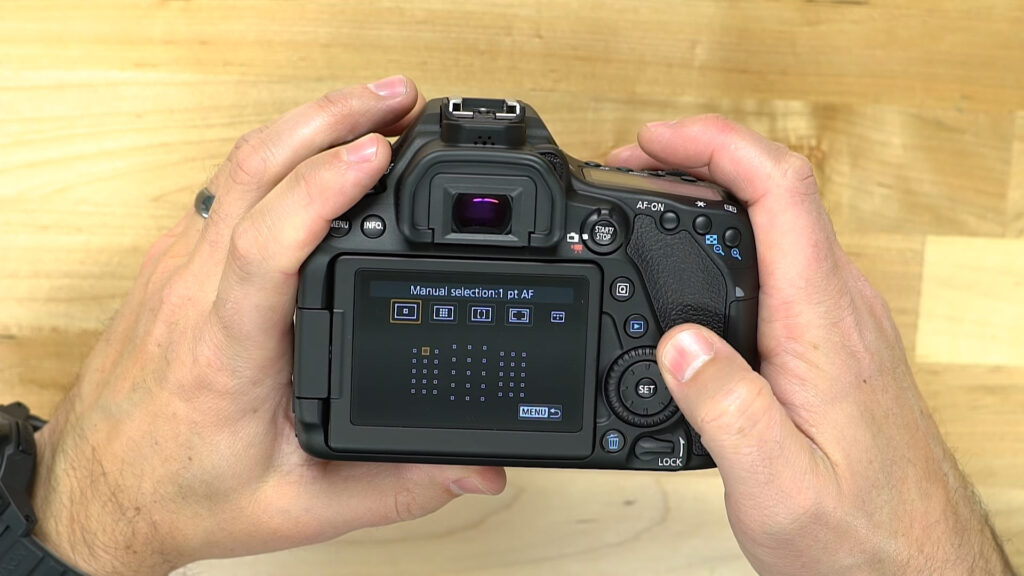
For Portraits and Landscapes, use Manual select: Zone AF or Manual select: 1 Point AF
The default setting will be Auto selection: 45 Point Auto Focus and you will want to change this to Manual select: Zone AF for static shots.
Manual select: Zone AF can be a quick way to get an accurate focus on a zone or region of your frame.
Manual select: 1pt AF is also a great option for Portraits and Landscapes. You can focus on a very specific highlight like eyes, or a tree on a mountain. This setting gives you the right kind of control when there is little to no movement in your frame.
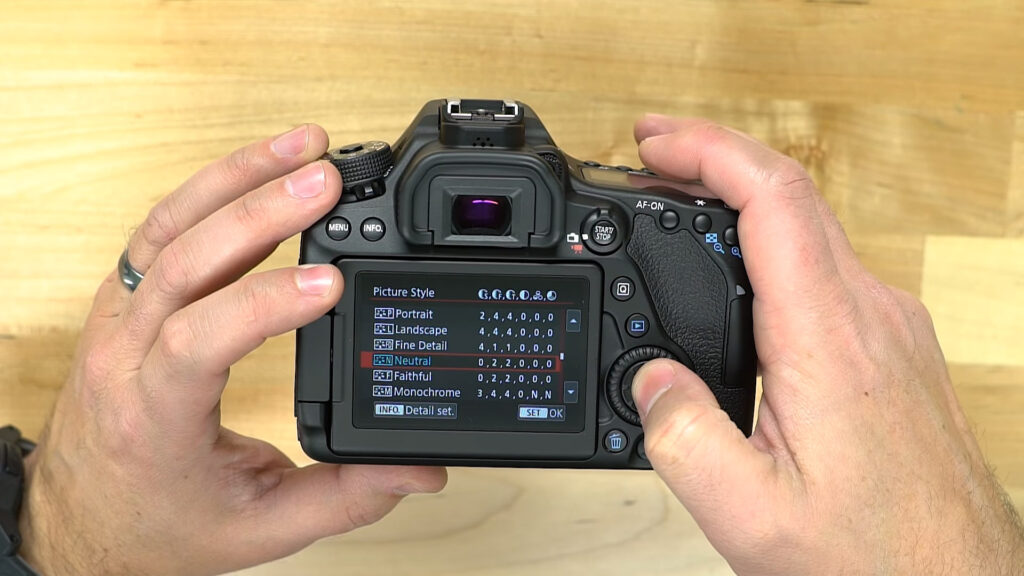
Change the default Picture Style from Auto to Neutral
While the Auto preset might produce a better photo in the moment, it will take away important information and details from your photo that will hurt the editing process. Setting your Picture Style to Neutral will produce a nice flat image that is far better for editing.
Standard is another decent Picture Style if you want a balance between having the camera affect the photo and leaving enough information for you to edit later.
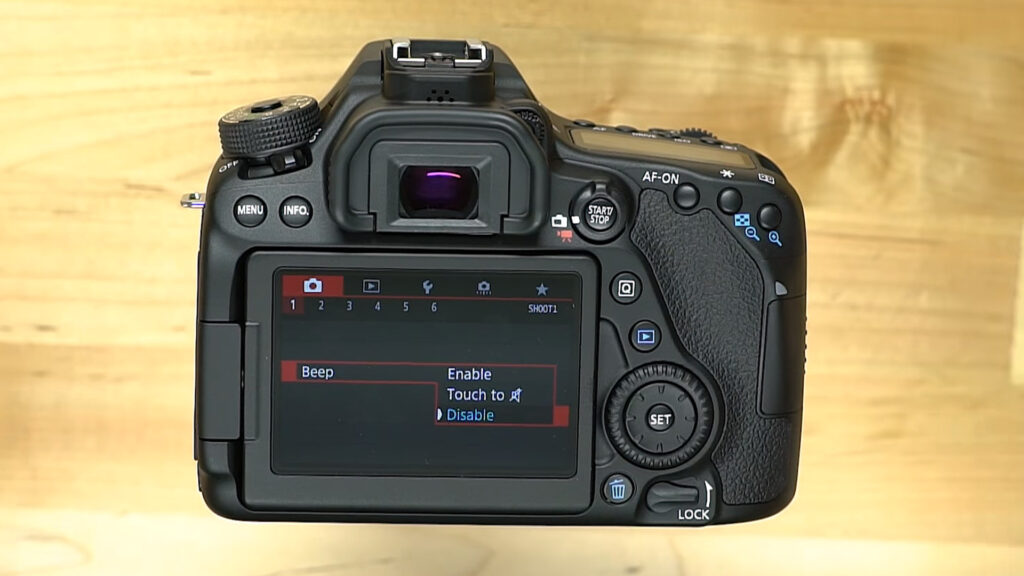
Disable Beep
The only useful time to utilize the Beep feature is when you are setting a timer and you aren’t holding the camera. Otherwise set Beep to Disable because it can be an annoying distraction to you and whoever you are photographing.
Video Settings
Toggle the switch into Video Mode and go to the fourth menu screen.
Movie Record Quality
Leave the camera in MP4 mode instead of MOV mode. There are more recording formats available for MP4 mode and avoid shooting in HD which is only 720P resolution.
I recommend shooting Full HD video which is 1920×1080 at either 30 FPS or 60 FPS, depending on what you’re doing with your footage.
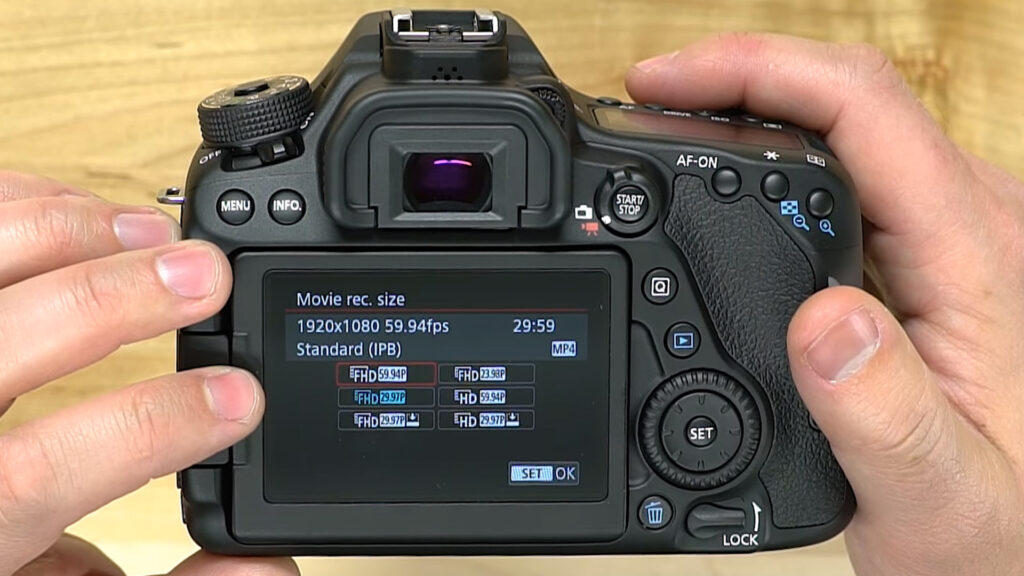
Selecting 60 FPS will allow you to slow down your footage and still maintain a nice smooth edit on a 30 FPS timeline within your video editing software.
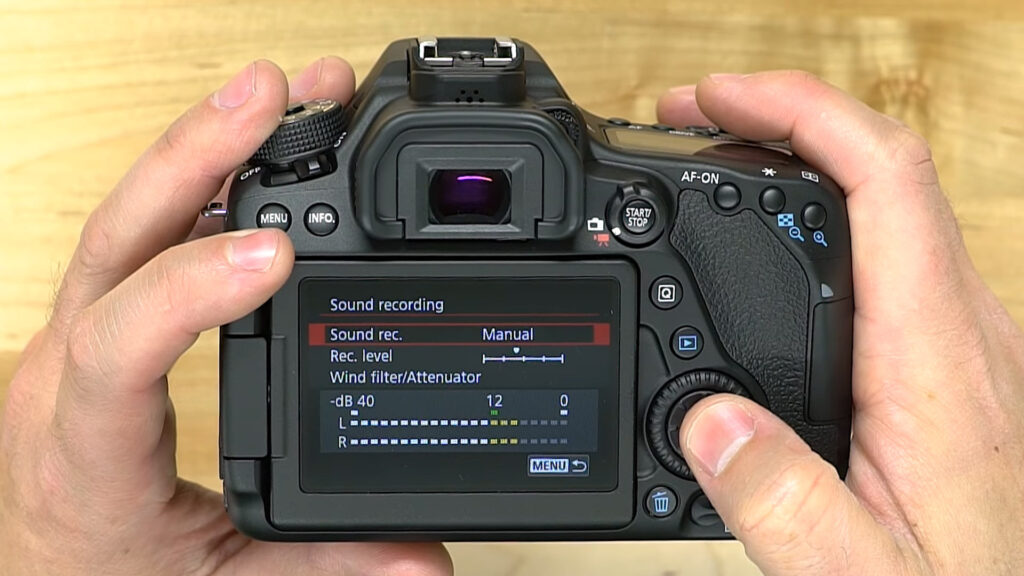
Sound Recording
Change the Sound Recording mode from Auto to Manual. While this might take more effort to monitor while filming, Auto mode will inadvertently boost your microphone and try to find audio to capture when there are moments of silence. This makes it difficult to edit later, because your levels will be all over the place, and there will likely be an annoying buzz or pointless background noise during these moments.
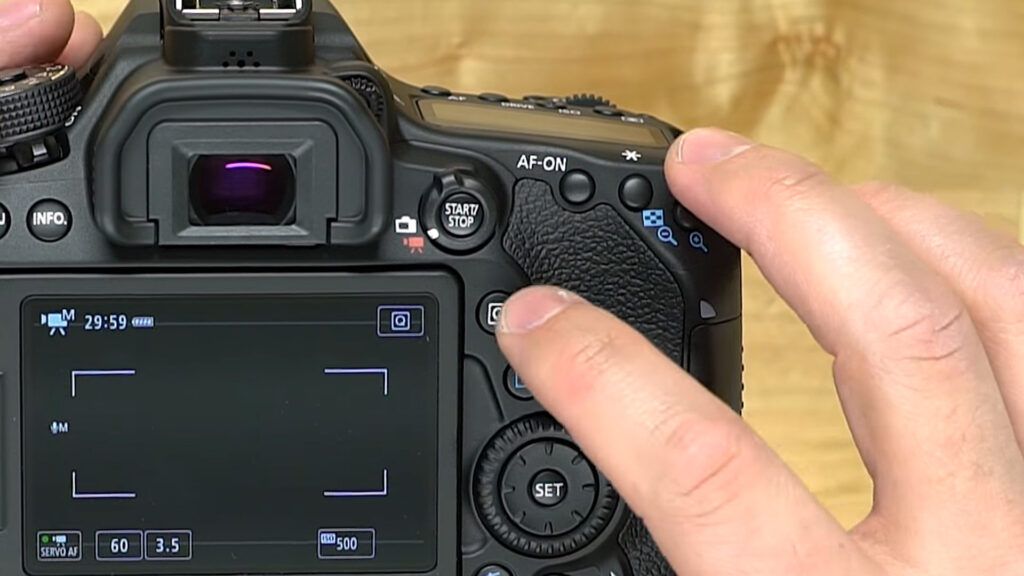
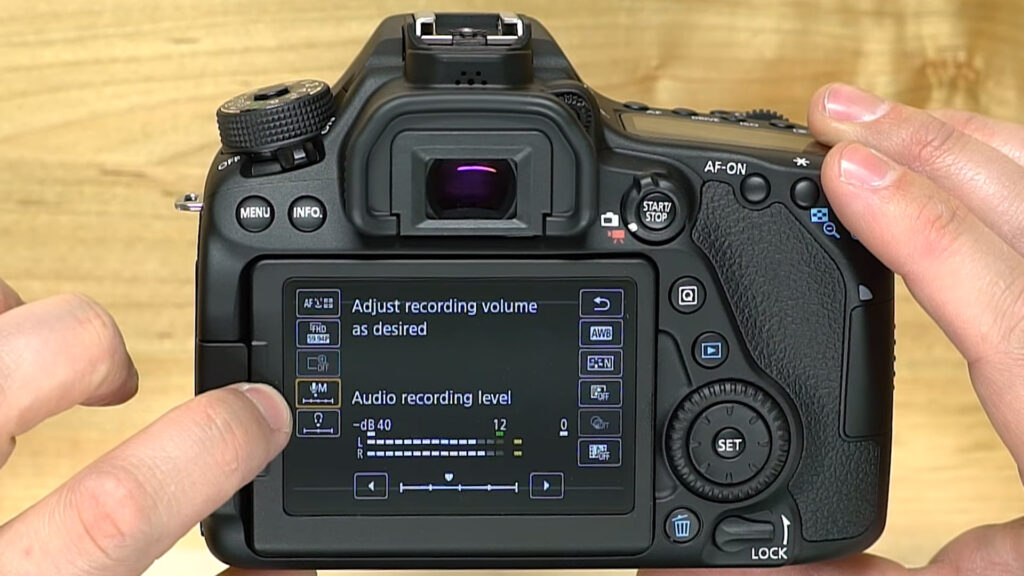
To quickly access your Audio levels, hit the Q button and tap Audio recording level. You can easily adjust theses levels on the fly.
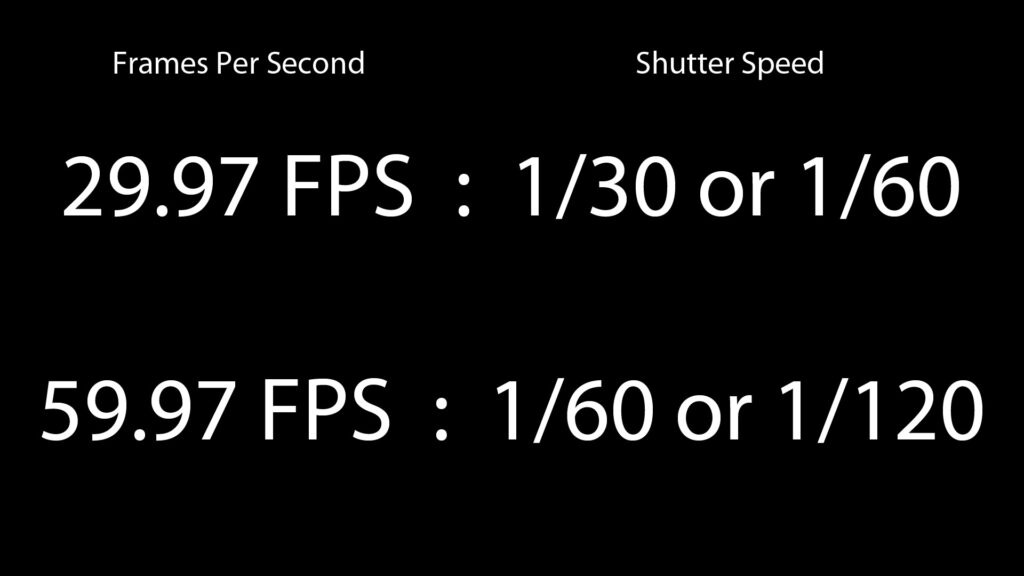
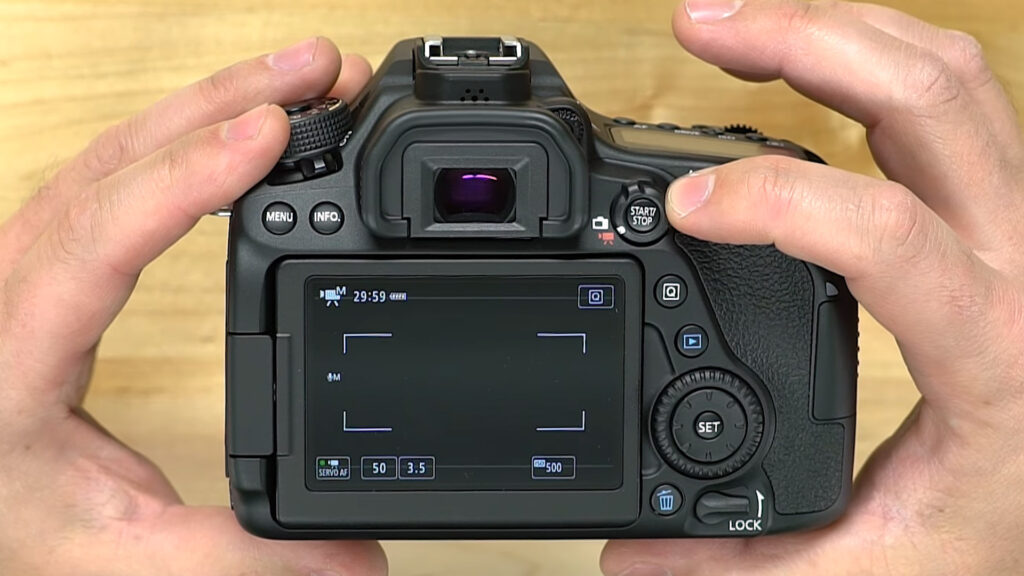
Shutter Speed Settings for Shooting Video
Always match or double the bottom number of your Shutter Speed of the Frames Per Second of your video. If you are filming at 30 FPS, then set your Shutter Speed to at least 1/30 or 1/60. If you are shooting at 60 FPS, then set your Shutter to either 1/60 or 1/120.
Bonus Tip: Formatting your SD Cards
Always format your SD Cards in the camera you are using them in, instead of another camera or computer. This will help you to avoid problems that might occur when the file directories are created on your SD Card as well as compatibility issues.
You can purchase the Canon EOS 80D Kit with EF-S 18-135mm here: http://amzn.to/2hT01UE

