So you just got a new GoPro Hero 10 and you can’t wait to get out and get some crazy action footage. You’re going to want to read about these 7 settings to change first if you want to get the best possible video quality out of your GoPro. It’s important to learn these settings because it’s going to help you shoot great footage and really understand how to film quality video. If you don’t have your GoPro Hero 10 yet, you can check them out here: https://jerad.link/goprohero10
Resolution and Frame Rate
Resolution and frame rate are two things that are very important to understand. With your Hero 10, you can shoot in a resolution up to 5.3k at 60 frames per second. Or, you can choose to shoot in 4k at 120 frames per second. The frame rate will dictate how much you can slow down your footage to get that buttery smooth GoPro slow-mo that we all know and love. Since 24fps is the most natural looking frame rate to the human eye, anything faster than that can be slowed down to that level to get great slow motion. For example, if you were shooting in 120fps at 4k, you could make that footage 5 times slower by slowing it down to 24fps, which would give you beautiful slow-motion.
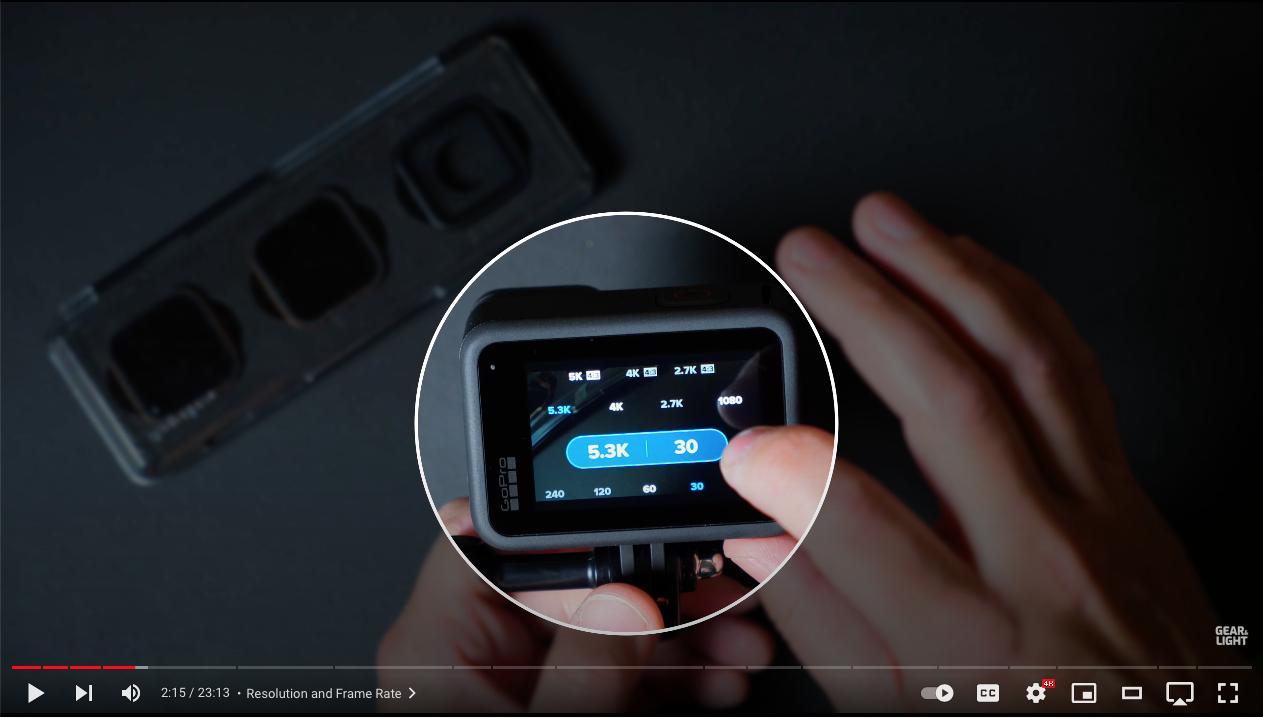
The resolution gives you a lot of extra wiggle room when you’re editing your video. If you filmed everything in 5.3k, but are editing the video in 4k, you can effectively zoom in on your footage without losing any quality or detail in that shot. Shooting in 5.3k does tax your battery life a bit, so I prefer to shoot in 4k.
Basically, the resolution and frame rate you choose will largely depend on what you’re trying to film. Are you editing your video in 1080? Then you may not need to be shooting in 5.3k. 4k, or 2.7k might be better options. Are you wanting to record crazy smooth slow-mo? Then, maybe shooting in 1080 at 240fps is the better option for you. The trick is to ask yourself what kind of footage you’re looking to capture and then custom set your frame rate and resolution accordingly.
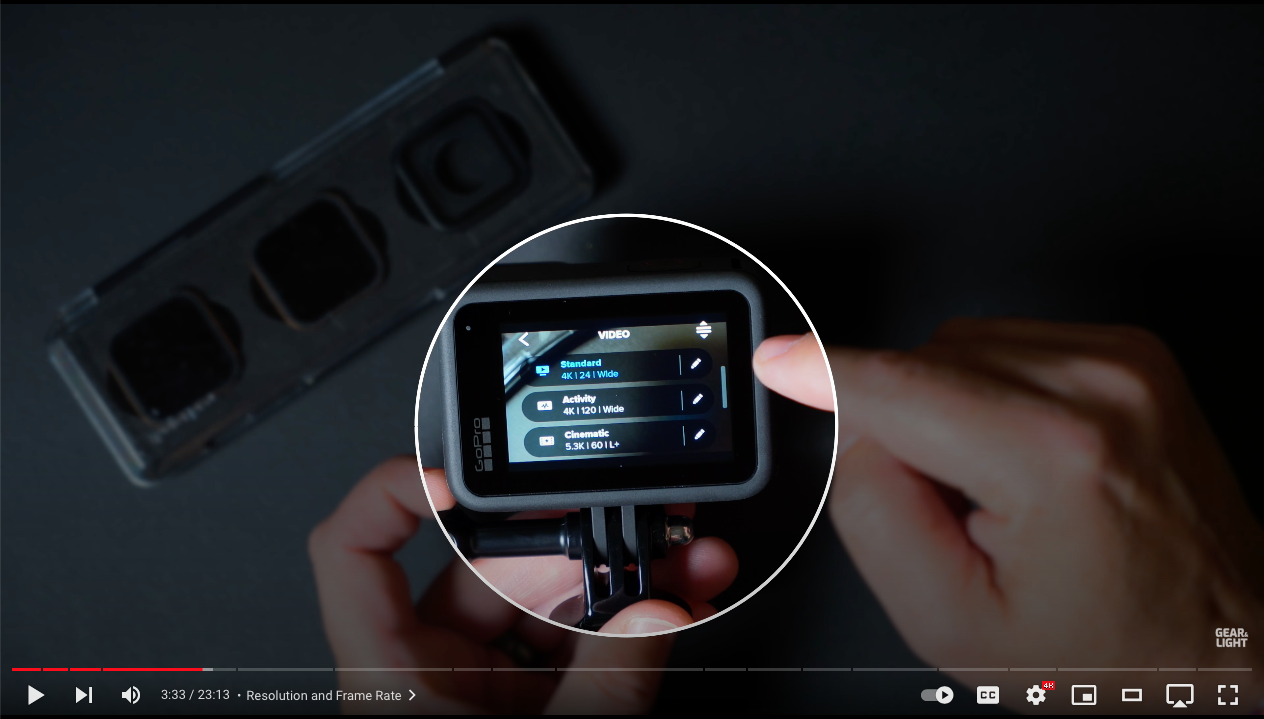
You can also set up custom shooting modes to quickly switch back and forth between different resolutions and frame rates. As you’ll see in the screenshot below, I have three custom modes. One is set to 4k at 24fps, the second is set to 4k at 120fps, and the third is set to 5.3k at 60fps. With these set, I can quickly change from a cinematic option at 24fps to a slow motion option at 120fps, and vice versa.
ISO Minimum and Maximum
Now we’re going to dive a bit deeper into the settings. First tap the little pen icon next to one of the custom modes.
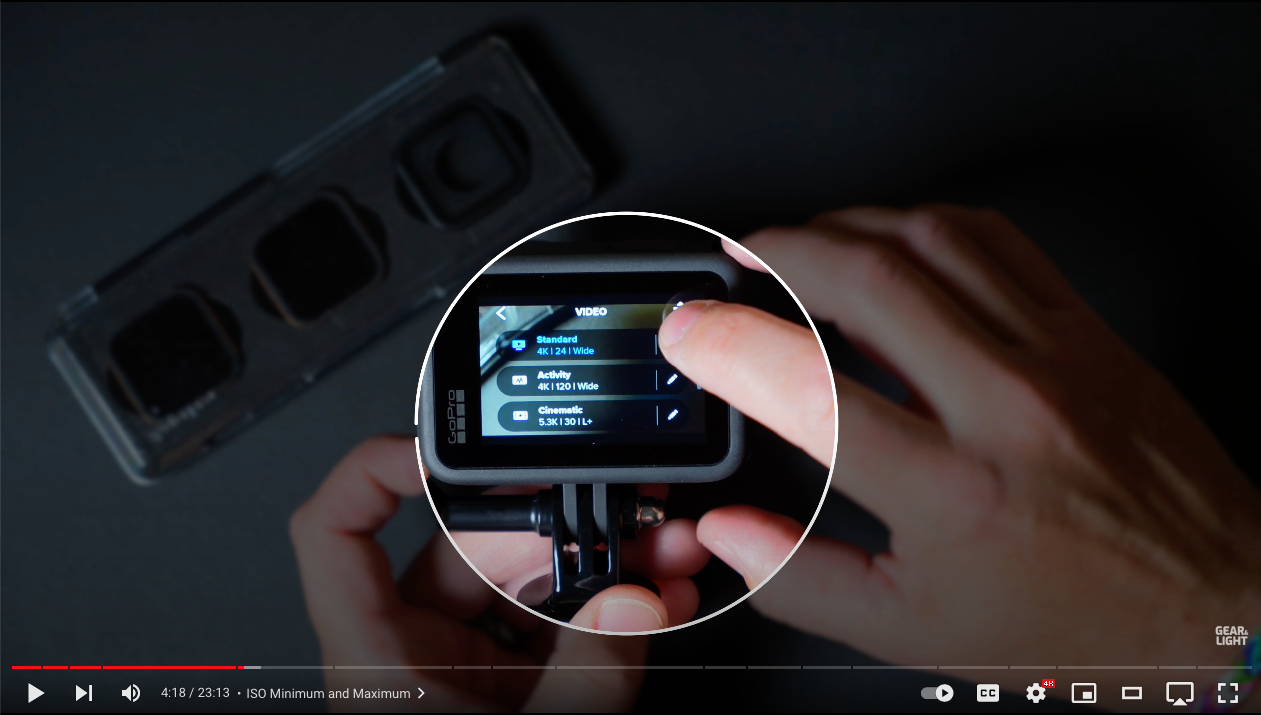
From there, scroll down until you reach the Pro Tune settings.
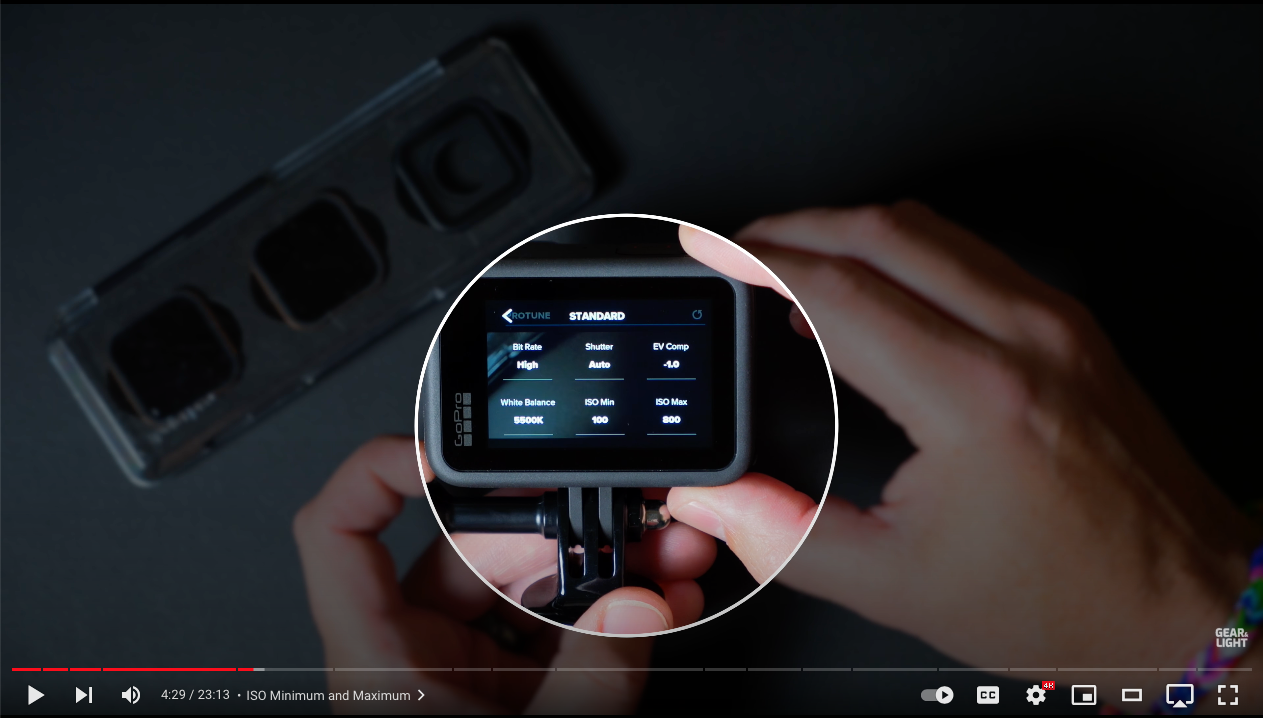
The first settings that we’re going to change here are the ISO minimum and the ISO maximum. I have mine set to a minimum of 100 and a maximum of 800. This will allow the camera to automatically adjust the exposure with the ISO between 100 and 800 as it sees fit. The ISO is the sensitivity of the sensor, which means that if the scene is darker it can make the sensor more sensitive in order to brighten up the shot. The issue is that we don’t want the ISO to go any higher than 800. If it goes higher than 800, the shot will start to look extremely grainy and noisy, which significantly reduces the quality of our footage.
Shutter Speed
Next We’ll adjust our shutter speed.

You can leave it set to auto and let your GoPro adjust it for you, but that will frequently make your shot look worse. Shutter speed is another setting that adjusts how much light there is in a scene. The problem is that if it’s set wrong, it can make your footage look unnatural. To get a natural looking shot, your shutter speed needs to be double the speed of your frame rate. So, if you’re shooting with a frame rate of 120fps, then you need to set your shutter speed to 1/240. Or if you’re shooting with a fps of 24, your shutter speed will need to be 1/48. This will ensure that your footage looks natural and realistic to the human eye.
ND Filters
These settings are important to getting a natural looking shot. Unfortunately, when you’re shooting in a very bright environment, it can be really difficult to maintain these settings. Shooting with a shutter speed of 1/48 on a bright sunny day will completely over expose and blow out your shot. Because of this, you can buy accessories for your GoPro called ND filters.

ND filters attach to the lens and act like sunglasses for your GoPro. Essentially, they limit they amount of light that reaches your sensor. This allows you to keep the optimal settings for video, while still properly exposing your shot. If you want professional looking footage out of your GoPro, these filters are a must. I use Polar Pro’s ND filters, but I’ll link to a couple options below:
https://jerad.link/goprohero10ndpolarpro
https://jerad.link/goprohero10ndfreewell
EV Comp
If you decide to leave your shutter speed set to auto, you’ll want to set your EV Comp setting to -1. The reason you want to set it to -1 is because the GoPro often over exposes the brighter parts of your shot, losing detail in the process. I typically prefer to underexpose the shot just a little bit so I can bring that exposure up properly when I edit the video. If you choose to set the shutter speed manually, then you don’t need to worry about this step.

Custom White Balance
Setting a custom white balance is also a very important part of getting a great looking shot.

The GoPro has different levels of white balance that you can set to make sure that your colors are accurate to the scene you’re shooting in. On a bright sunny day, you’ll want to set this to be a bit warmer, around 5600. This will make sure that the white parts of your shot are actually white, and not slightly blue or orange. At night, or in a cooler environment, you’ll probably want to set the white balance to be much cooler. If you set your white balance to auto, your GoPro will constantly be adjusting your white balance depending on your scene. If this happens, you’ll likely end up with inconsistent colors in your video.
Bit Rate
To get the highest quality footage out of your GoPro, you’ll want to set the bit rate to high. There is a standard and a high option, but the high option will give you the optimal image quality. Keep in mind, it will also make your file sizes bigger, so you may want to go with the standard option if you’re worried about running out of space on your SD card.

Sharpness
Sharpness is something that GoPro adds in to a lot of their footage to help compensate for the fact that it has a tiny little sensor. Now, the problem with adding sharpness is that there’s no way to remove it once it’s been added. A much better option is to leave the sharpness set to low in the GoPro so that you have complete control over how much sharpness you add when you’re editing your footage later.

Color
Next, I change the color to flat. There are two other options here: vibrant and neutral. Changing the color to flat will make it so your GoPro isn’t over saturating certain colors in your shot. Again, the goal here is to have as much control as possible in editing instead of allowing your GoPro to just guess what you want your shots to look like.

Fields of View
Even though your GoPro only has one lens, it offers multiple field-of-view options that basically crop in your shot to get a certain look.

You can choose anywhere from SuperView, which will give you the biggest possible angle in your shot, to linear, which will crop in your footage until the bug-eye effect is gone and the shot horizon is completely straight. Most of the time I shoot in the wide view, which I find allows a lot of angle to be in the shot without distorting the edges too badly like the SuperView field will. The option you choose depends largely on the style of footage you’re looking for and the environment you’re filming in. Keep in mind, some of the more cropped in fields of view won’t work if you’re shooting in a higher resolution like 5.3k.
Micro SD Cards
I highly recommend that you upgrade your SD cards to V30 or V60 options. These V-ratings define how well your SD cards will be able to keep up with shooting at high resolutions and in a high bit rate. I’ve found that any card rated at V30 or higher will be able to handle shooting in 5.3k at the high bit rate setting. If you choose to use a V60 card, you’re basically future-proofing your SD cards. Now, when the GoPro Hero 11 and 12 come out someday, you’ll be able to rest assured that your SD card will be powerful enough handle those higher qualities as well.
You’ll also want to format your SD cards in the GoPro before filming. To do that, ensure that there aren’t any files on your SD card that you don’t want to lose. Then, on your GoPro, go into preferences > scroll down to reset > and format your SD Card.

This step is a precaution to ensure that there aren’t any issues with writing data to that card. The last thing you want is to film an epic day of adventure only to find out your footage is unusable.
Last Tip
Don’t shoot in 120fps unless you need it. A lot of people get excited that they have the 120 option, but unless you actually want a specific shot to be slowed down by 5 times, using it will only drain your battery faster.
Final Thoughts
I hope the settings we discussed help you improve the quality of your GoPro footage. I know we talked about a lot, and it can seem a bit daunting to understand it all if you’re a beginner at filming, but if you take the time to master these few things, it will make a world of difference! If you’re looking for more information on how to really master your GoPro, check out these videos on the Gear and Light YouTube Channel:
I also have a brand new course coming on getting started with filming on a GoPro that will walk you through everything you need to need to know to get epic footage that will wow anyone who watches it. You can subscribe to be notified when that course releases here:

