The DJI Mavic Air 2S is my go to drone for almost anything I shoot. It’s incredibly nimble, portable, and it shoots great video. Now, in order to get the greatest possible footage out of this drone, there are some specific settings that you’ll want to understand how to use. We’ll walk through all of them in this article. If you haven’t purchased the Mavic Air 2S yet and you’re interested in doing so, you can check it out here:
Choosing the Best Resolution
The first setting you’ll want to set is your resolution. Typically, it’s best to shoot in the highest possible resolution. I shoot in 4k a lot of the time because it gives me more options when it comes to the frame rate that I want. You can shoot in 5.4k as well. The only issue there is that you’ll be very limited on your frame rate. 5.4k does allow you to crop in when you edit and still have a full resolution 4k image, which can be a very helpful feature. Choose whichever setting will best suit your needs for the shot you’re trying to capture.
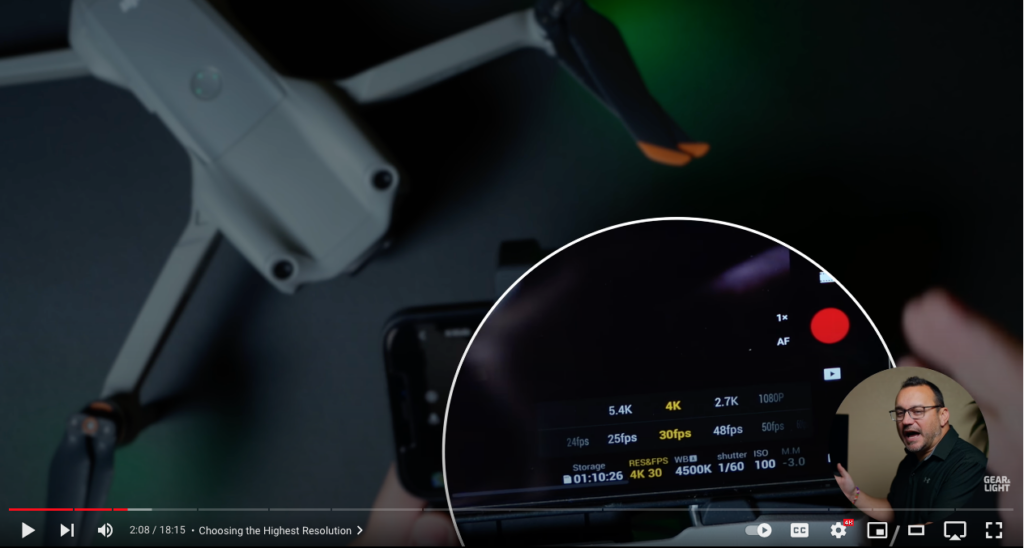
To set the resolution, select the RES&FPS option in the bottom of the screen and slide the resolution bar to your desired setting.
Choosing the Best Frame Rate
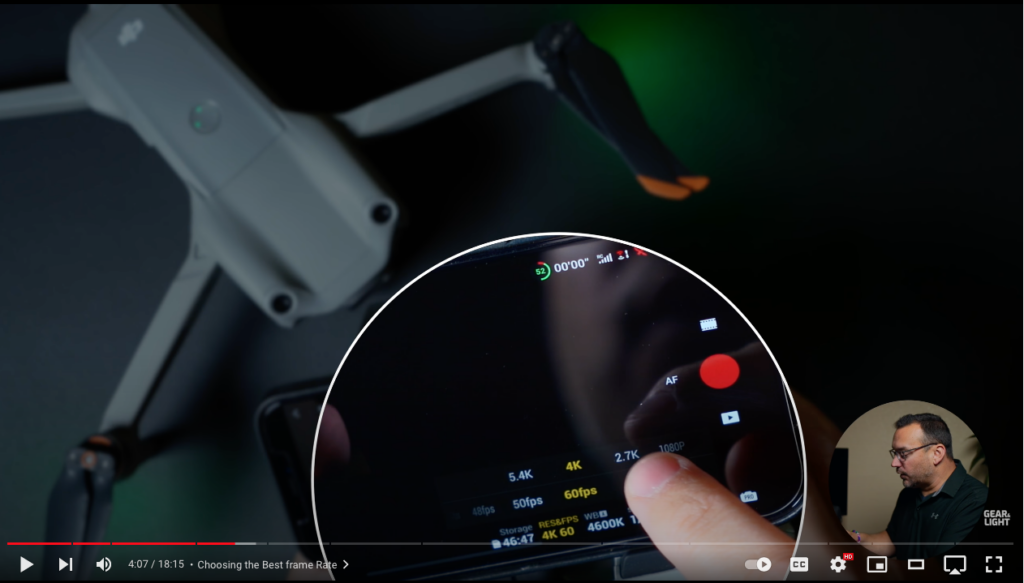
Your frame rate is how many frames your drone will capture each second. So, a frame rate of 24p will mean your drone’s camera is capturing 24 full resolution frames each second. These frames are then placed together in a sequence to create your video. The cinematic standard for video is 24p because that is the number of frames per second that looks the most natural to the human eye. The only reason you would want to shoot in a frame rate higher than 24p is if you wanted slow motion footage. You could choose to shoot in 60p which would allow you to slow down your footage in post production to that standard 24p to make your slow motion look natural and smooth. To summarize, you should typically always shoot in 24p unless you want your shot to be in slow motion.
Manual Camera Controls
To get to your manual controls you’ll tap the pro icon in the bottom right corner of your phone screen.
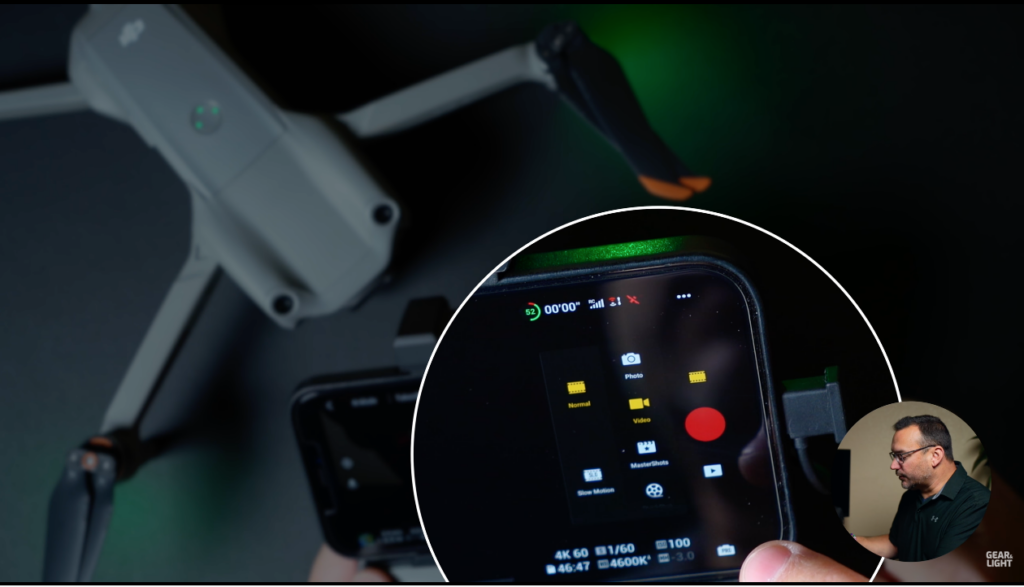
If you leave your drone in auto mode, it will automatically adjust your camera controls to what it thinks will be the best shot. Unfortunately, it doesn’t always do a great job and you’ll find that your footage won’t have the same quality that it would if you controlled the settings manually instead. Using pro mode will ensure that your video is consistent and high quality.
ISO
The ISO is the sensitivity of the sensor. It helps boost the amount of light that the sensor is able to see so you can properly expose your shot. However, the sensitivity is not the best on this drone. To set your ISO, push the ISO adjustment button in the bottom right corner and then choose the number that best exposes your shot.
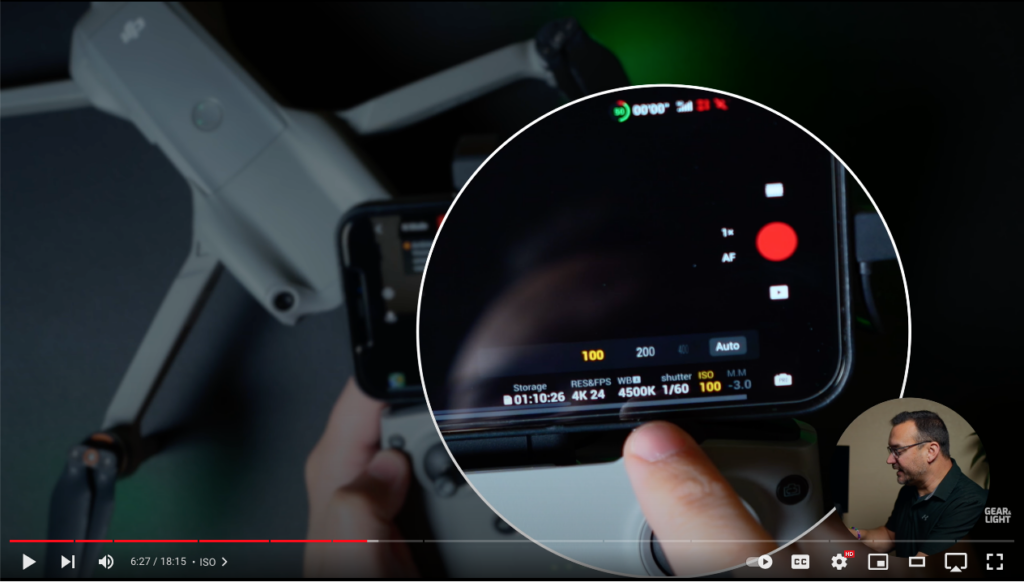
I recommend that you never go above 800 however, because anything over 800 is going to look extremely grainy and noisy, reducing the quality of your footage. If you’re in a bright situation, keep your ISO as low as possible for the cleanest looking video.
Shutter Speed
Your shutter speed adjustment is right next to the ISO adjustment. If you’re flying in a place that has inconsistent lighting, it’s best to leave this set to auto. This will allow your drone’s camera to automatically adjust the exposure as you change from one lighting situation to the next. If you’re flying in a place with consistent lighting however, you should set your shutter speed manually. I only put the shutter speed in auto mode If I absolutely have to. Your shutter speed should be set to twice the amount of your frame rate. So, if you’re shooting in 24p, your shutter speed should be set to 1/50. If you’re shooting in 60p, your shutter speed should be 1/120. The only exception here is if the scene becomes too bright to hold this level. In that case, you can make your shutter speed faster to compensate for that exposure.
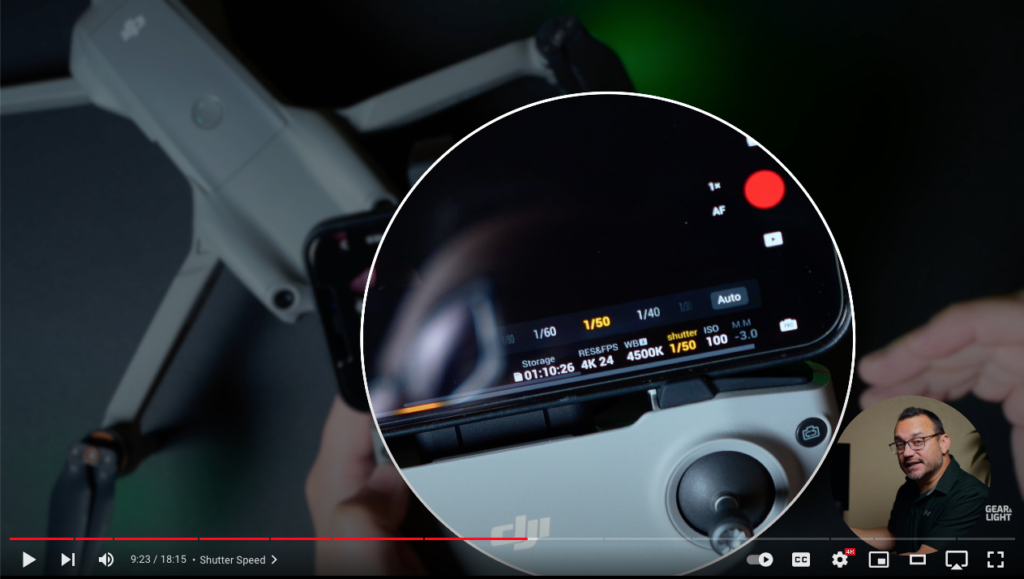
You can also choose to purchase something called ND filters. ND filters are basically sunglasses for your camera that limit the amount of light that will hit the sensor. These screw onto the lens of your drone’s camera and make it so that you can keep your shutter speed where it needs to be while still properly exposing your shot. This is the absolute best way to get the highest possible quality footage out of your Air 2S. You can check out the ND filters that I use here:
https://jerad.link/mavicair2sfreewellnd
Metering
To make sure your scene is exposed correctly, you’ll want to keep an eye on the meter in the bottom right corner of your screen.
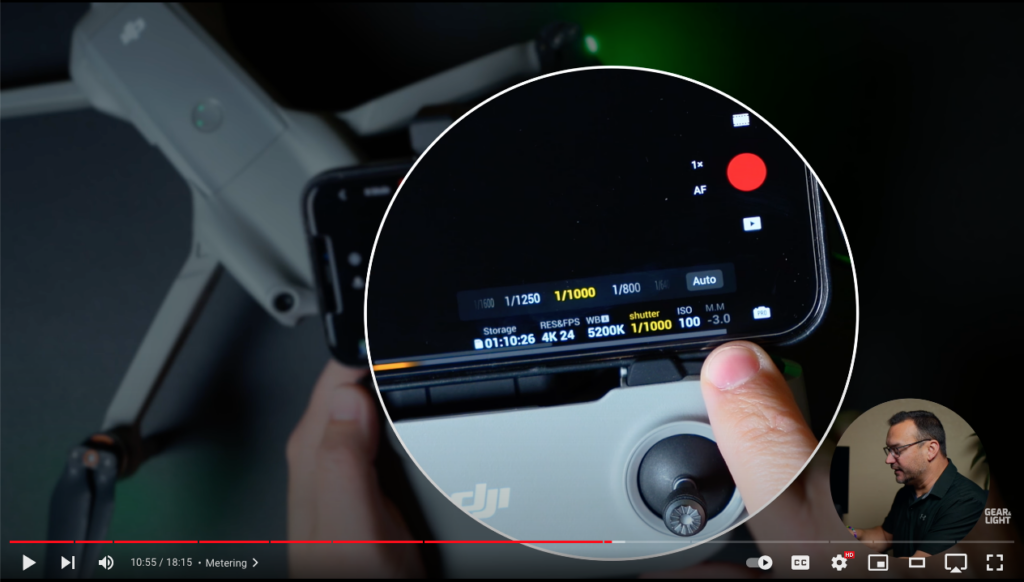
Your meter will give you a numerical value that represents how bright the brightest part of your shot is. When I’m shooting, I’m aiming to have an exposure of -1.0. I’ve found that using an exposure of 0 will still sometimes over expose certain areas which causes a loss of detail in my shot. Keeping the exposure at -1.0 ensures that I’m not losing any details in the highlights of my footage. I can always brighten up my shot in post production if I need to.
One important thing to note here is that you can set your meter to a specific number if you’re shooting in auto shutter. This will tell your camera how bright you want the shot to be, and it will adjust the shutter speed accordingly.
White Balance
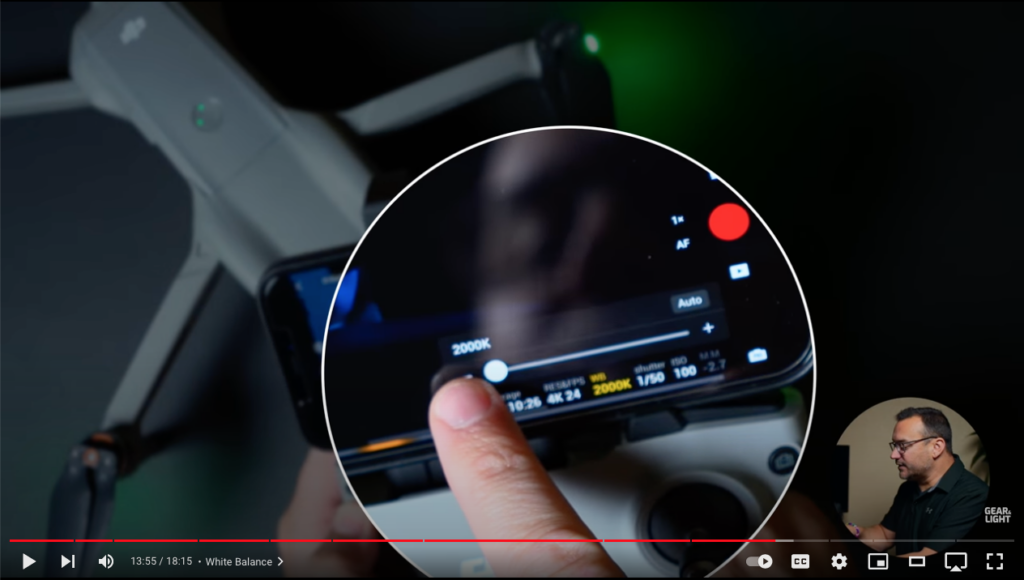
The last setting we’re going to change is the white balance. Your white balance changes the temperature of your footage. If it’s too high, your footage will look to orange and warm, and if it’s too low, your footage will look too blue and cool. The best practice here is to manually set your white balance according to the environment you’re shooting in. If it’s a hot sunny day, you’ll want to have your white balance set higher at around 5600. If it’s the middle of winter and cloudy you’ll want to set it much lower. Your goal here is to make sure that the whites in your footage look completely white, not orange or blue. To access the white balance controls, tap the WB button in the bottom next to the shutter speed.
Camera Settings
Now let’s dive into the actual camera settings and adjust some things in there. Tap on the icon in the top right corner and then tap the camera option.
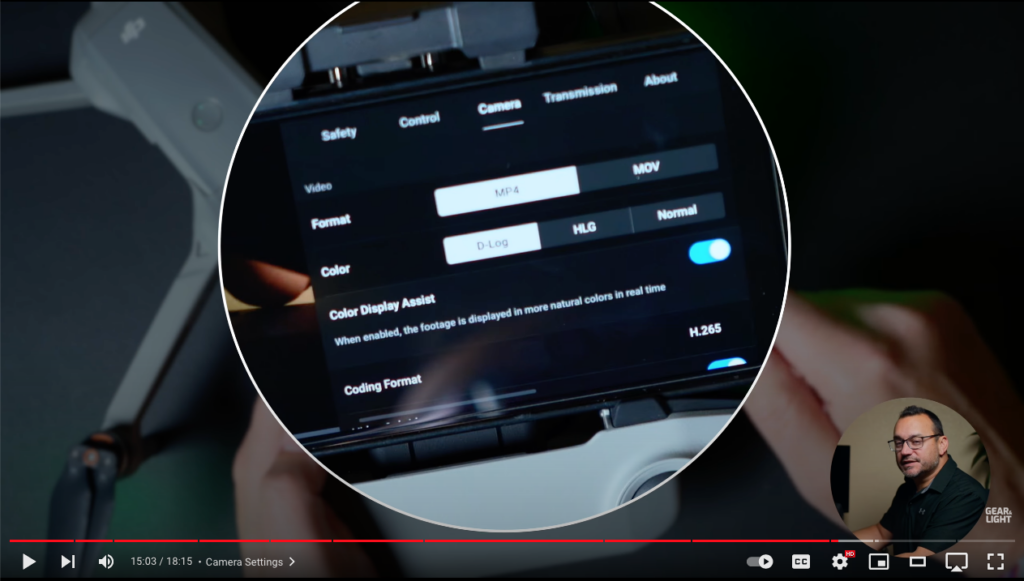
I almost always shoot in MP4. If you’re a Mac user, MOV works great too.
Under color, I shoot in D-Log. This option gives me a more flat image in the camera. A flat image gives me much more control over the colors when I’m editing in post. If you’re not familiar with video editing and adjusting colors, I recommend you stick with normal.
Extra Settings
There are a few extra things that I like to set just to help me out when I’m shooting. If you keep scrolling down in the camera settings tab, you’ll find the overexposure warning switch. Turning this on will allow your camera to warn you if your shot is overexposed. This is going to help you out a lot as you’re learning how to expose your shots.
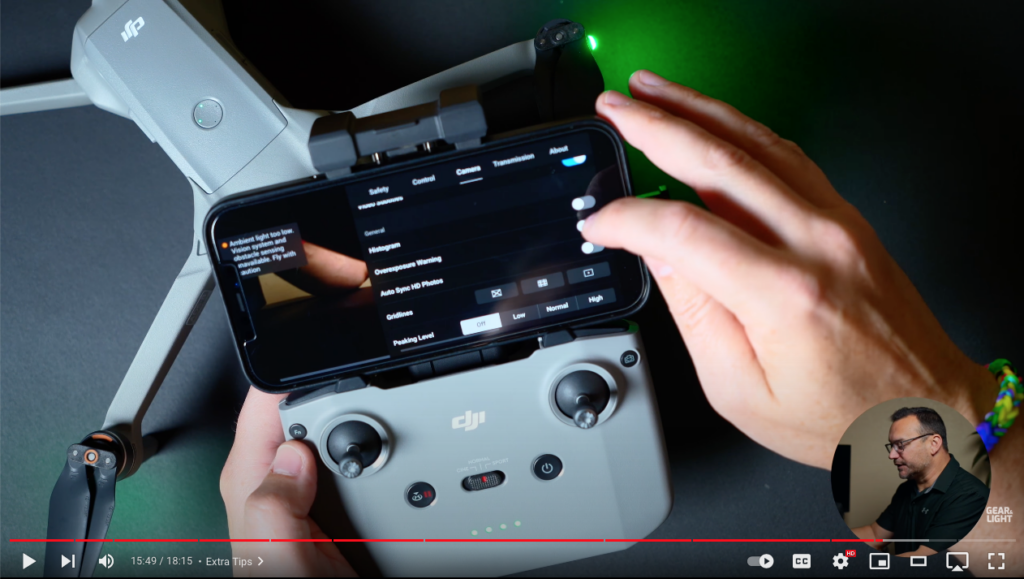
Another one I turn on is gridlines. Gridlines will place guiding lines across your screen to help you frame your shots. You’ve got 3 options for gridlines so you can turn on whichever ones you find helpful.
Lastly, I highly recommend you start your session by formatting your SD cards. This is going to prevent any issues with data writing to you card. Make sure that you have everything you want pulled off of your cards first, as formatting them will erase any data on them.
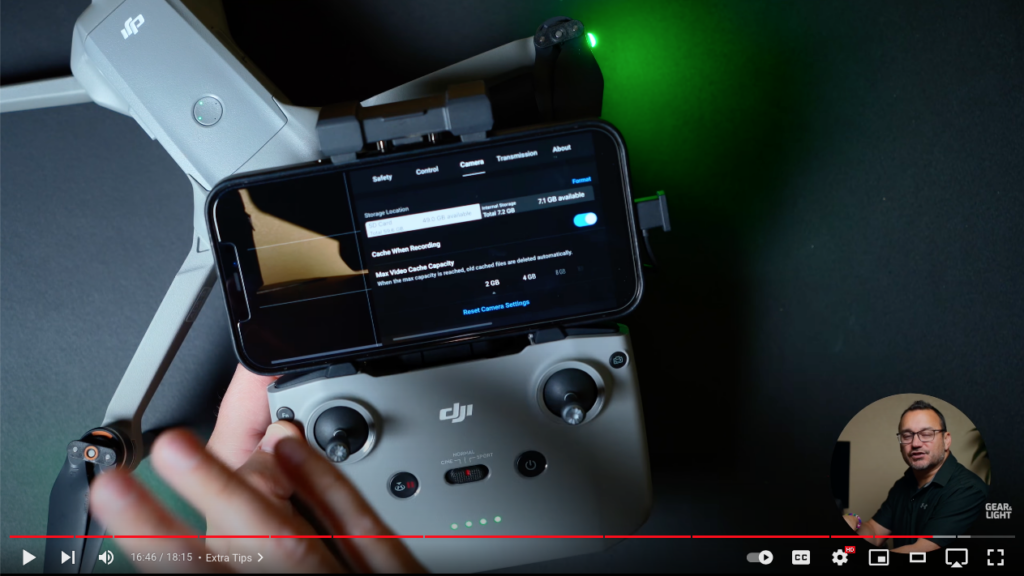
You can also check out the cards I use here:
https://jerad.link/sandiskmsd128gbv30
Final Thoughts
I hope you found this article helpful. I know that it was a lot of information, but learning these things will sky rocket the quality of your drone footage. If you’re interested in learning more about drones and how to best utilize them, check out these videos on the Gear and Light YouTube channel:
