The Sony a7C is a fantastic camera. It’s incredibly small and lightweight, but still takes high quality pictures and rich-looking video. If you have an a7C or are considering getting one, these settings will make your shooting experience better and will give a nice boost to the quality of your photos and videos. I made a video on this topic as well on the Gear and Light YouTube channel. If you’d like, you can check out that video here:
Shooting In Manual Mode
Shooting in manual mode with any camera is going to get you better photos overall because you are going to be able to control the scene and the settings to get the best possible exposure.
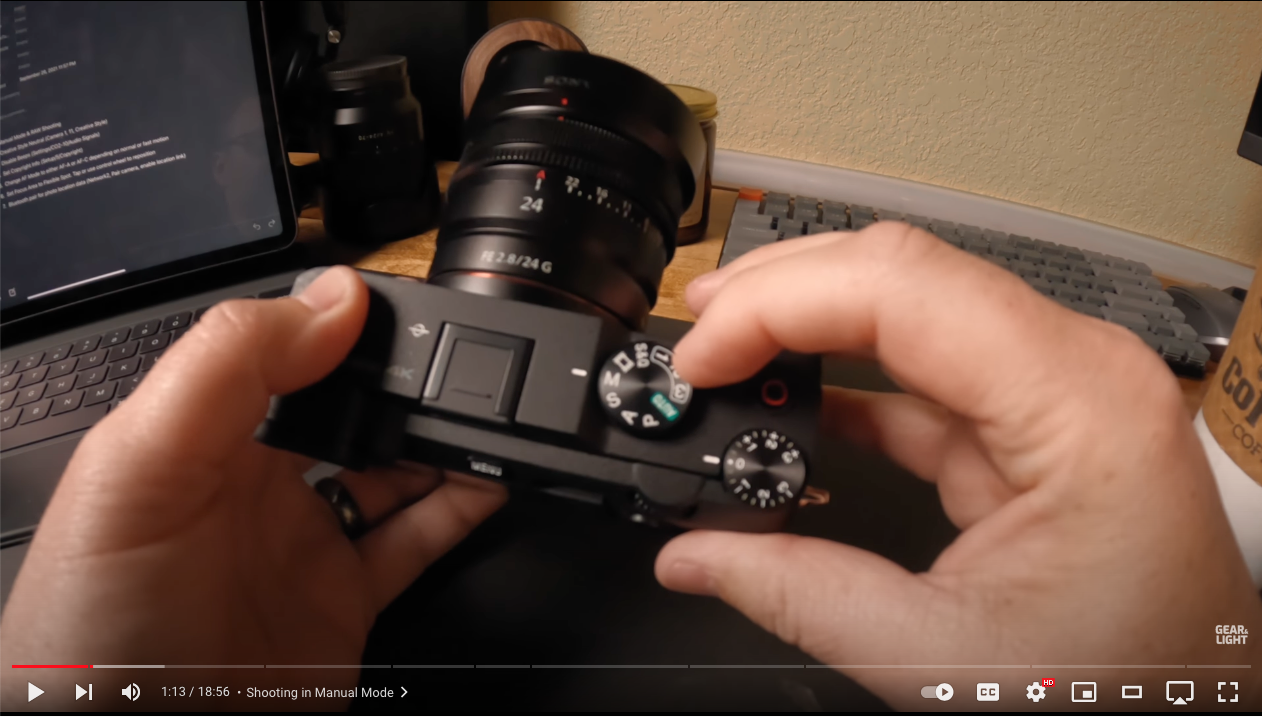
With manual mode, you control the shutter speed, the aperture, and the ISO manually. There are however, a few modes that allow you to manually adjust some of these settings manually, while the others are automatically adjusted by the camera. Those modes are:
Aperture Priority: With this mode, you manually adjust your aperture and to the setting you want. Then, your camera will adjust the shutter speed and the ISO automatically to get the best exposure.
Shutter Priority: With shutter priority, you manually adjust your shutter speed to get the setting you want. Then, your camera will adjust the aperture and the ISO automatically to get the best exposure.
These modes are called assisted manual mode. They can be very helpful for your shooting if you are looking to get out of automatic mode and start getting into shooting in manual. However, once you understand how each of these settings work, manual mode will give you the greatest control over the exposure of your shot. If you are interested in learning more about shooting in manual, check out my free course called Ditch Auto where I teach people exactly how to control your manual settings to get the greatest possible shots.
Link to Ditch Auto: https://jerad.link/ditchautocourse
Raw & JPEG Mode
After switching to manual, the next setting I adjust is the file format. Your camera can shoot images in two different formats: Raw and JPEG.
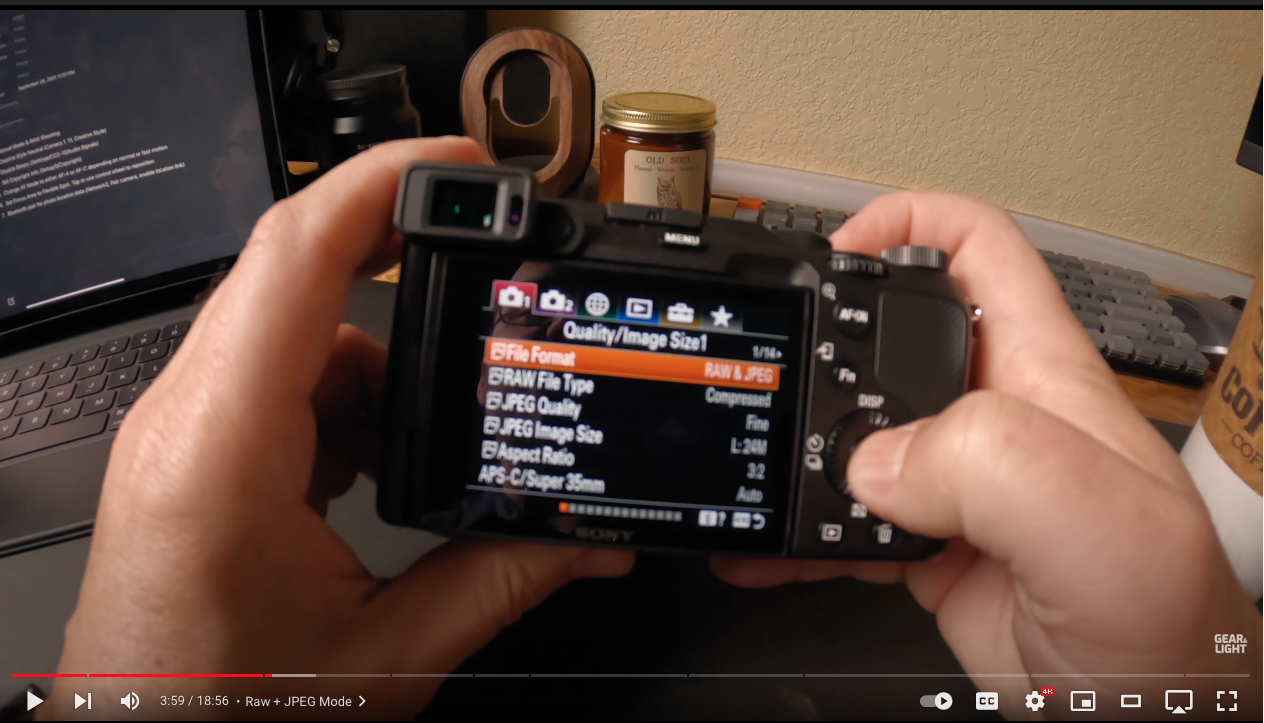
The Raw file format is going to give you the biggest file sizes. It also gives you the greatest amount of information which will help you out a lot when you go to edit your images. JPEG is a much smaller image, and it doesn’t have nearly as much information as the Raw image does. The a7C has the option to shoot a Raw image and a JPEG image at the same time. I like to select this option because it offers a backup photo in case something goes wrong with the Raw image file. I’ve had a few instances in the past where the raw images I shot were corrupt and unusable. Fortunately, I was able to still get those shots from my camera because I had this setting set to take both a raw photo and a JPEG. When the Raw files failed I was able to utilize the JPEGs to recover those shots.
Creative Style
The next thing we are going to change is the stylizing that’s added to JPEG images.
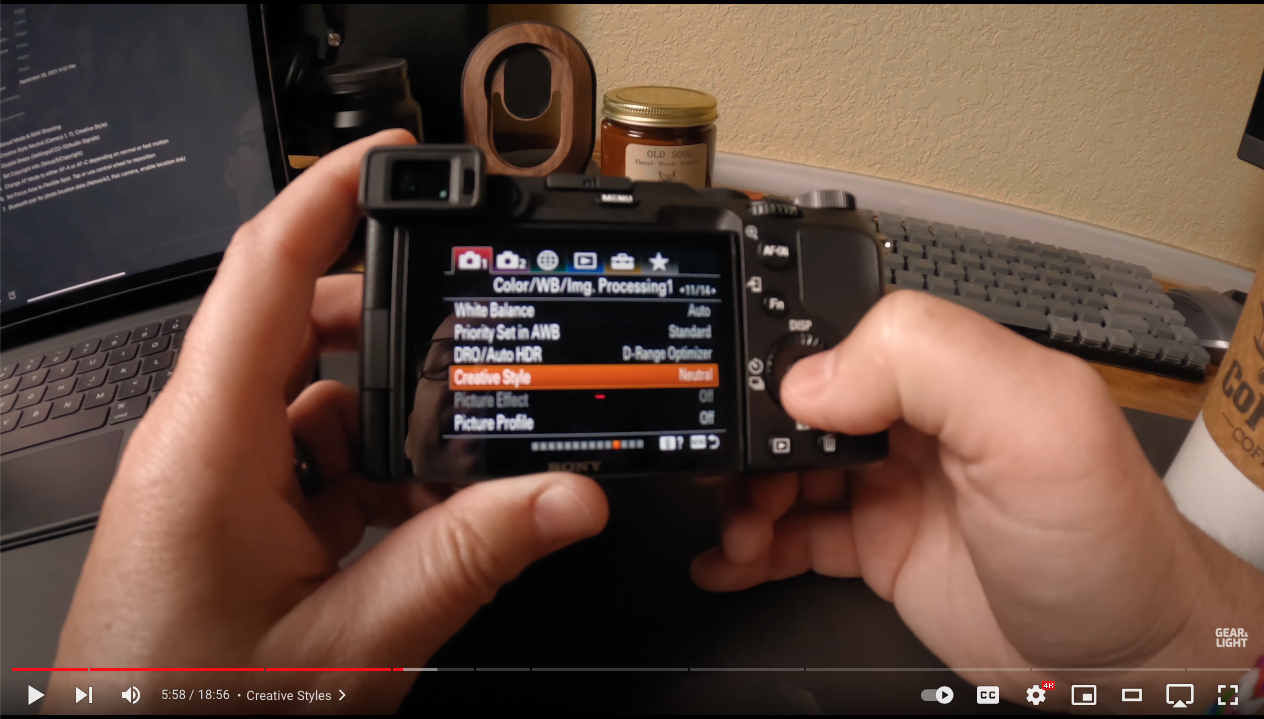
Go over to the creative style option in your settings and set that to neutral.
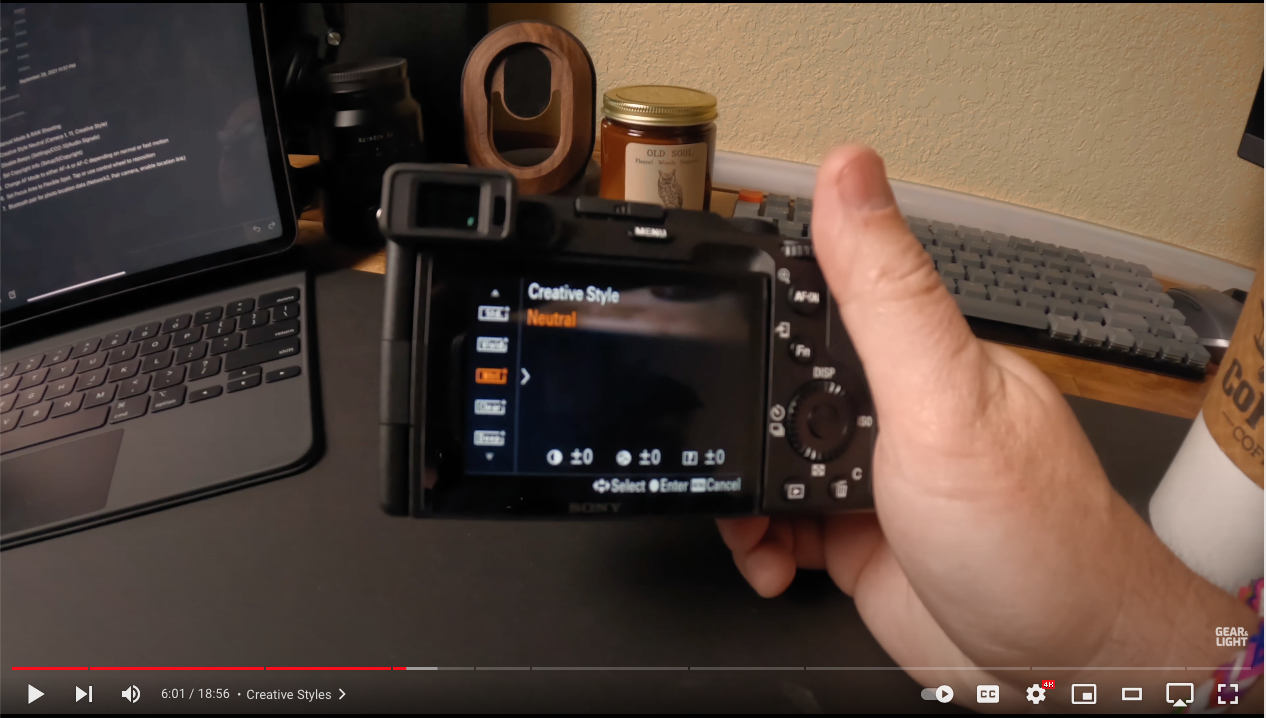
If, for some reason, you end up needing those JPEG images, you don’t want any additional processing to be added to those images. Setting the creative style gives you a nice flat image, which is as close to Raw as you can get. The Neutral setting doesn’t add any contrast, sharpening, or saturation to your image, which means you will be able to do all of those things yourself when you edit the images.
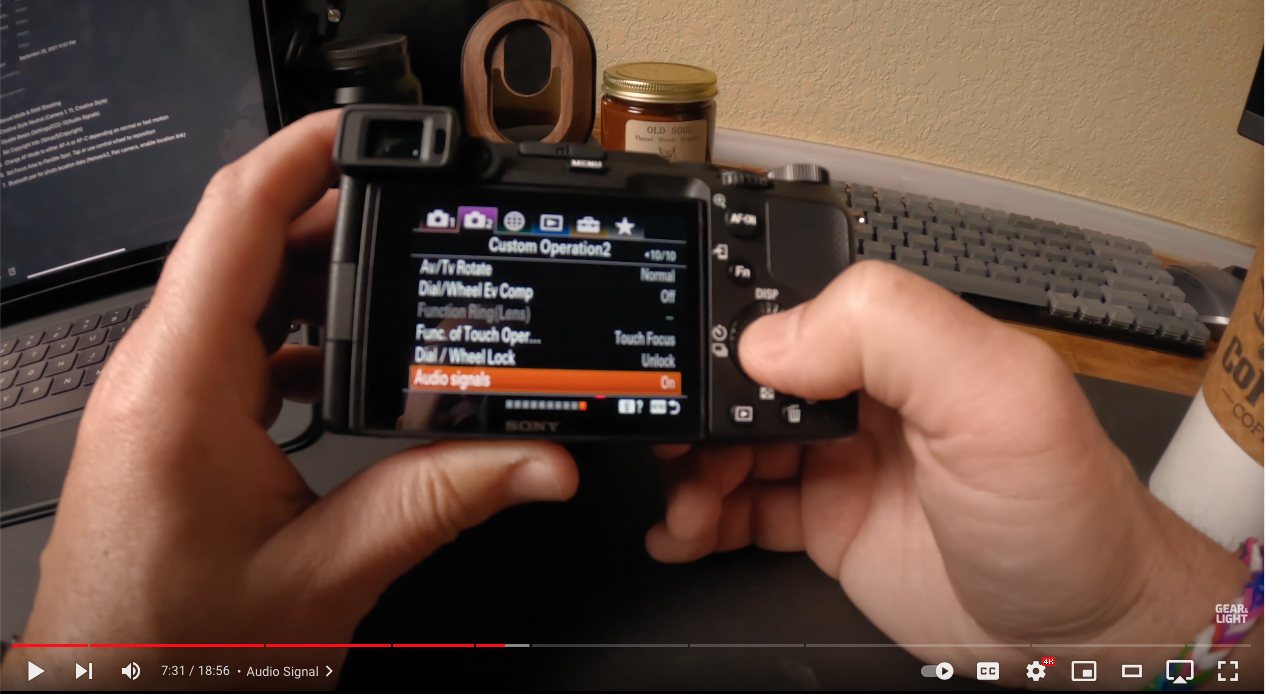
Audio Signal
The next change, which will save you a headache, is to turn off the camera beep. By default, your camera beeps every time it achieves its focus. This is an unnecessary feature and can get a bit annoying on a long shoot. You also have a visible indicator that shows when your focus is set, so there is no need for an audible indicator as well. To turn that off, head to the audio signals option in your menu and change it to “off.”
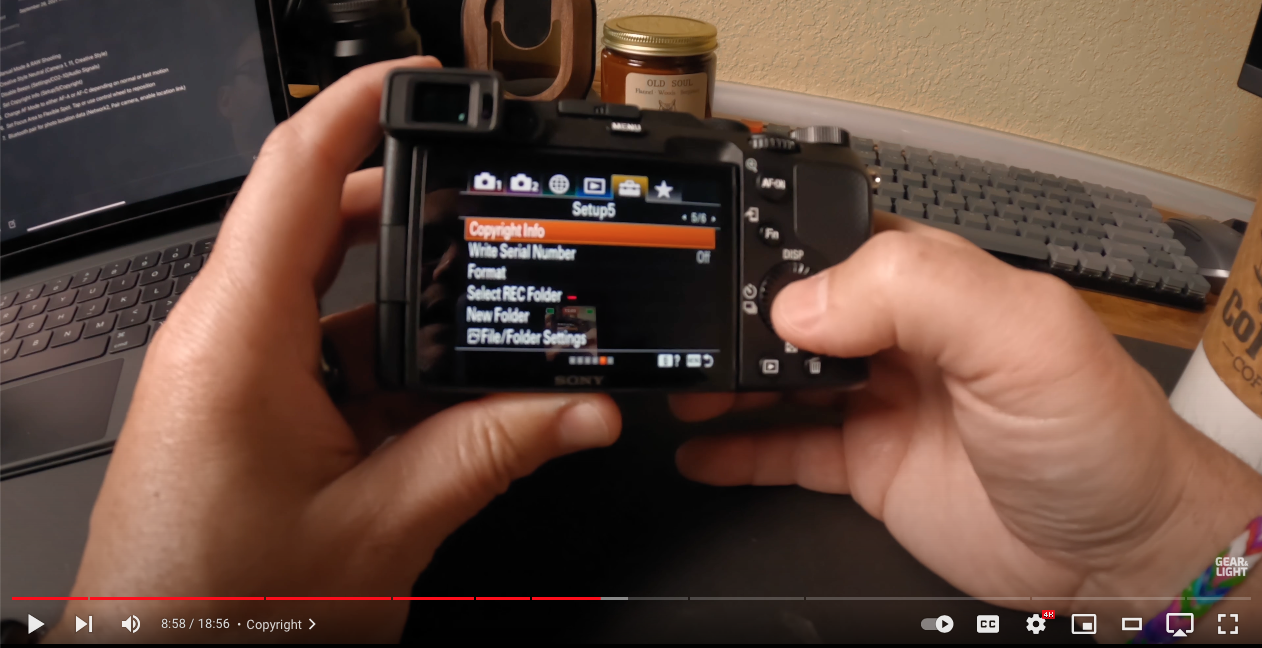
Setting a Copyright
The next thing we’ll do is set a copyright for our images. I’ve had people take my images and use them in places I never intended for them to be. They’ve used them in blogs, on websites, even on company websites. To protect yourself from this, you can set a copyright from your camera. Go to the copyright info option in your menu:
Turn write copyright info on, set the photographer info as your name, and then choose “all rights reserved,” under the set copyright option. This is information that’s going to be written to the file of your image, so anyone who sees the file information can see that the image is copyrighted.
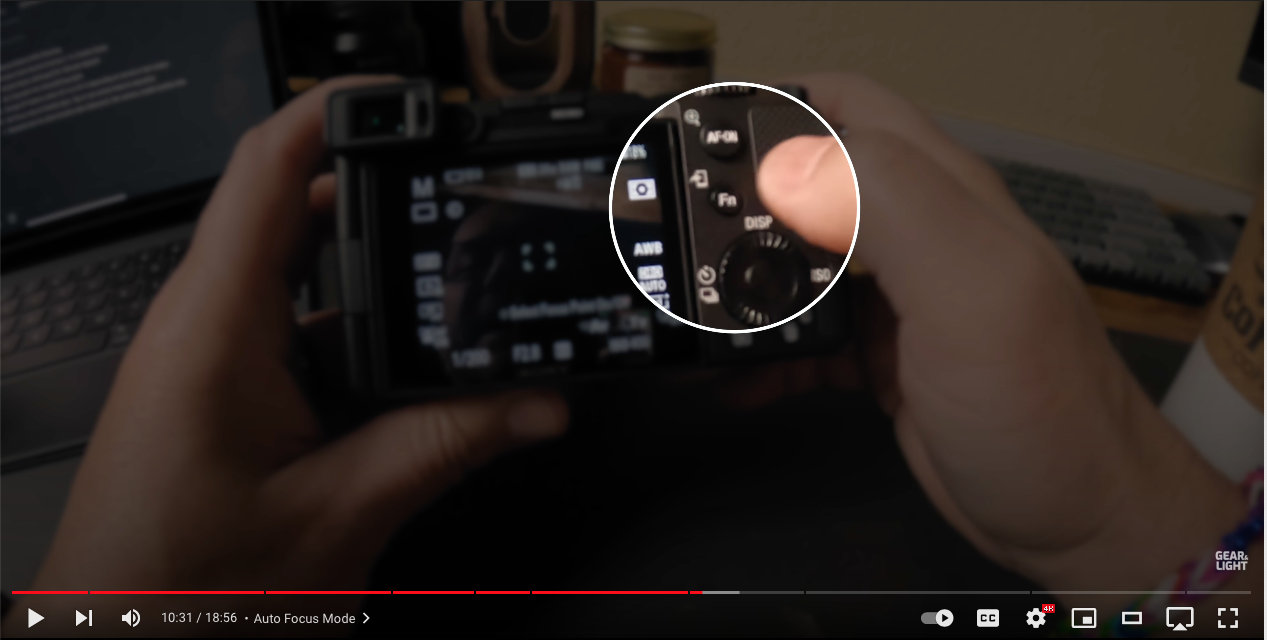
Auto Focus Mode
Now, we’re moving into settings that will affect how we actually shoot an image. The first setting we’ll change here is our auto focus mode. To get there, push the function button on the back of your camera:
and then select the focus mode.
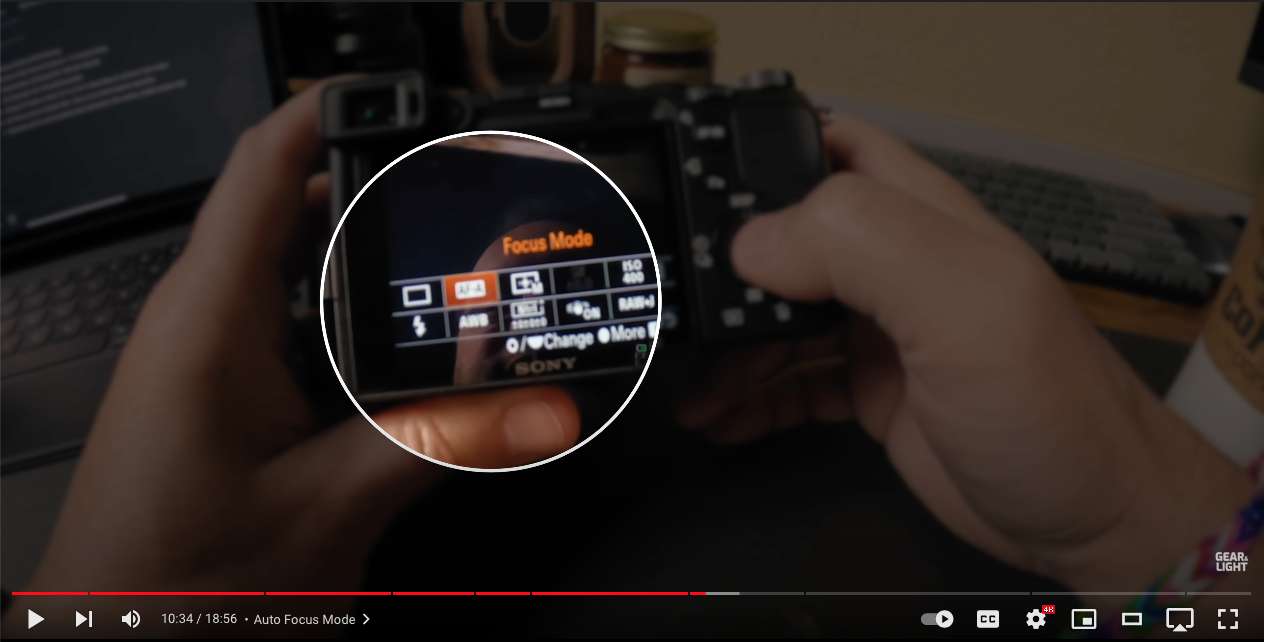
From there, I use either AF-A or AF-C. AF-A let’s the camera track and follow subjects and typically holds the focus pretty well. It’s not, however, the best option for shooting fast moving things like sports. If I’m shooting something fast, I’ll shoot with AF-C, which is continuous. This will tell the camera to move the auto focus quickly to keep up with fast-moving subjects. I’ll also use manual focus occasionally, depending on the environment and the circumstances.
Focus Area
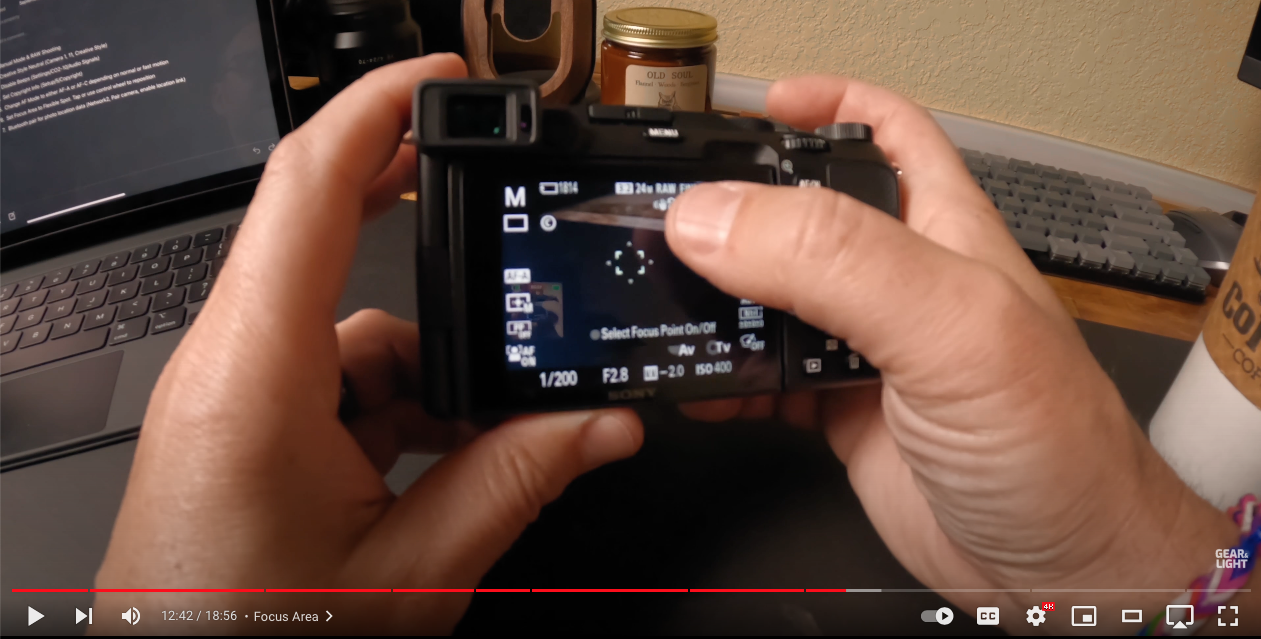
I also change the area that my camera focuses on. To do that, press the function button and then select the focus area option.
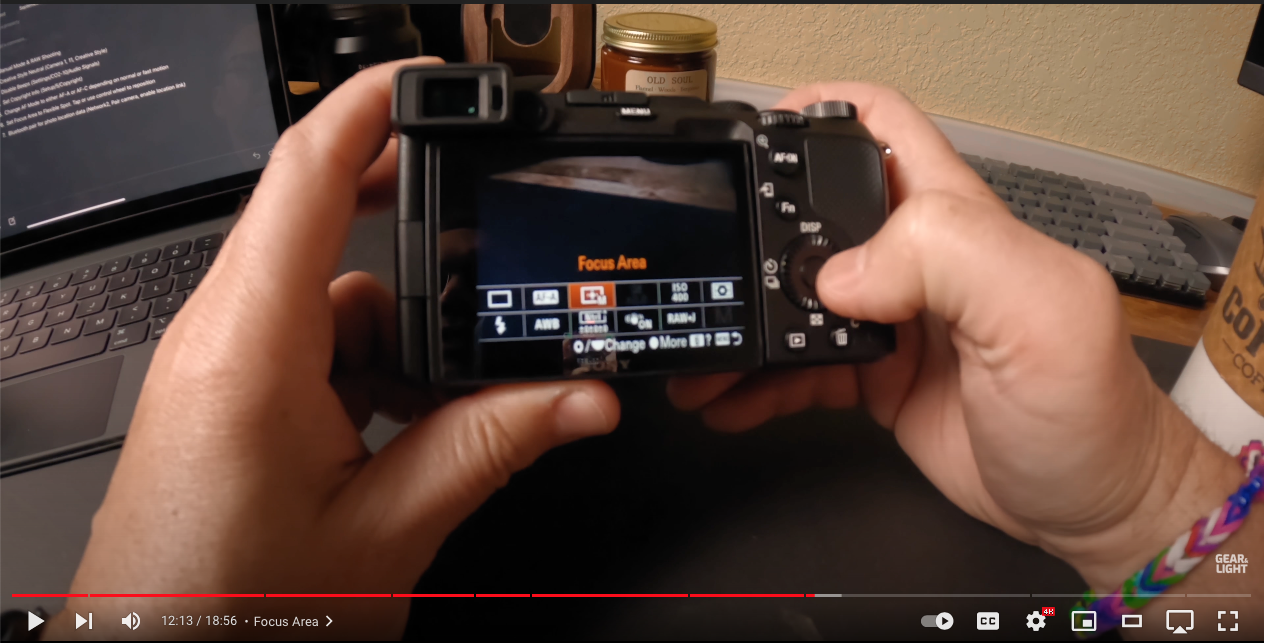
I always utilize the focus area flexible spot option. I use this because it allows me to control exactly where the camera looks to focus. This helps to prevent any issues with the focus being off, or with the focus moving around too much. Even though cameras are getting much better auto focus technology, they still mess up from time to time. This flexible spot option allows you to set a very precise spot for your camera to look at, and your footage will be better because of it. You can also use the touch screen on your camera to tap and move that spot around.
Pairing Your Phone
The last thing we’re going to do is pair our phone to the camera. Doing this will let your camera use your phone’s location software to save your location data to the image as well. To do that, go to the bluetooth settings option in your menu.
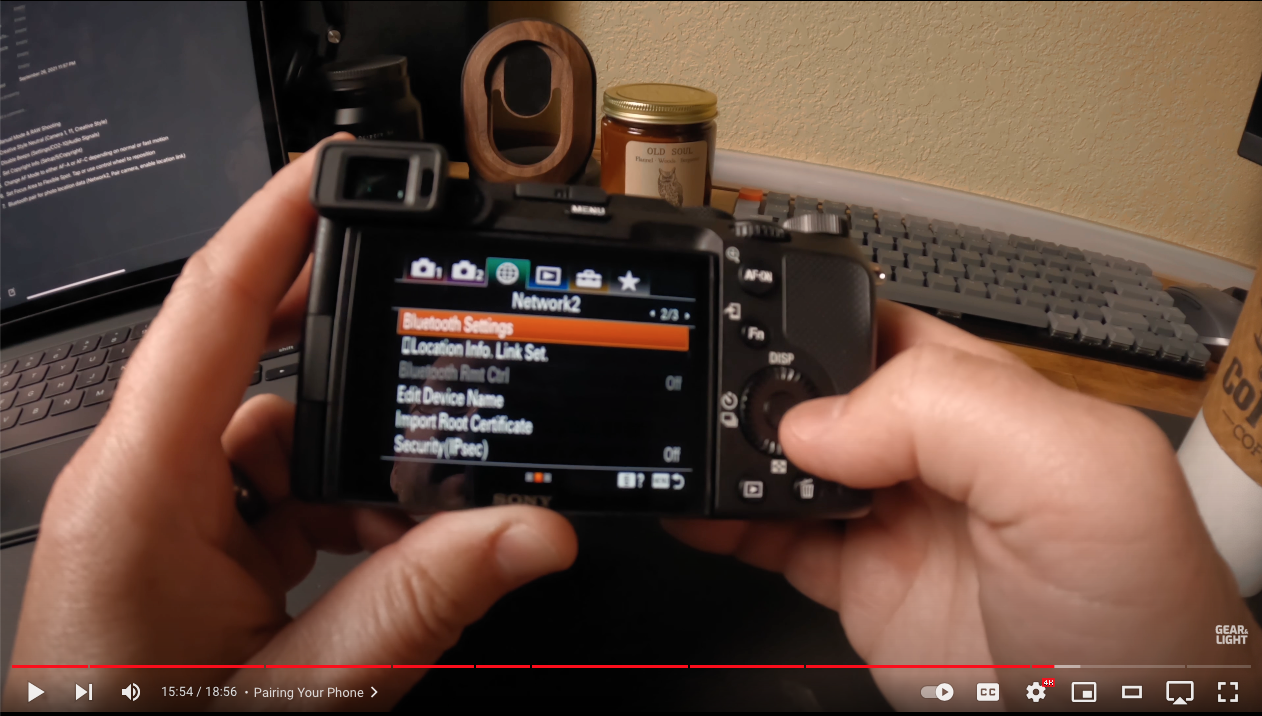
From there, turn on Bluetooth settings and then select pairing:
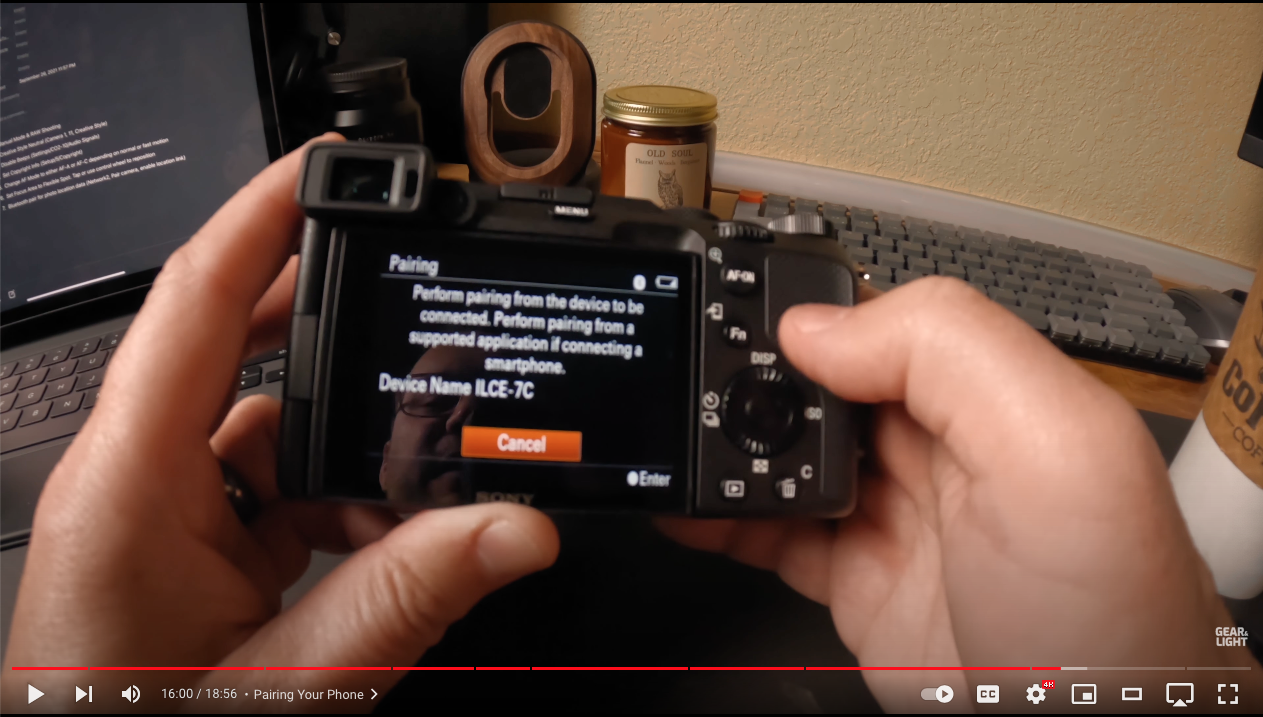
Once we’ve opened that screen we need to pair our phone to the camera. To do this, jump on your phone, go to the image edge app, and then open the location information link option.
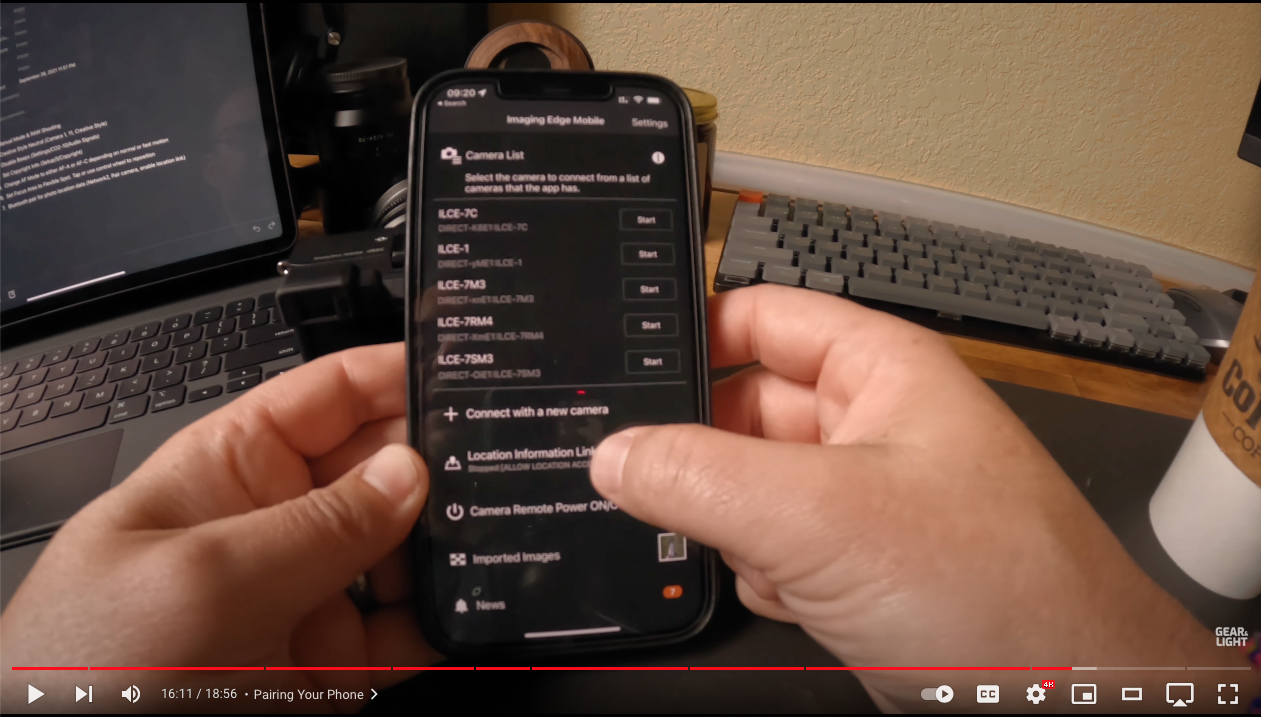
Once you’ve done this, you should see your camera listed as an option to pair with. If it doesn’t, you’ll need to go to the home screen of the app and go through the pairing process there. Your camera will ask whether or not you want to allow connections from your phone. Select, “Ok.”
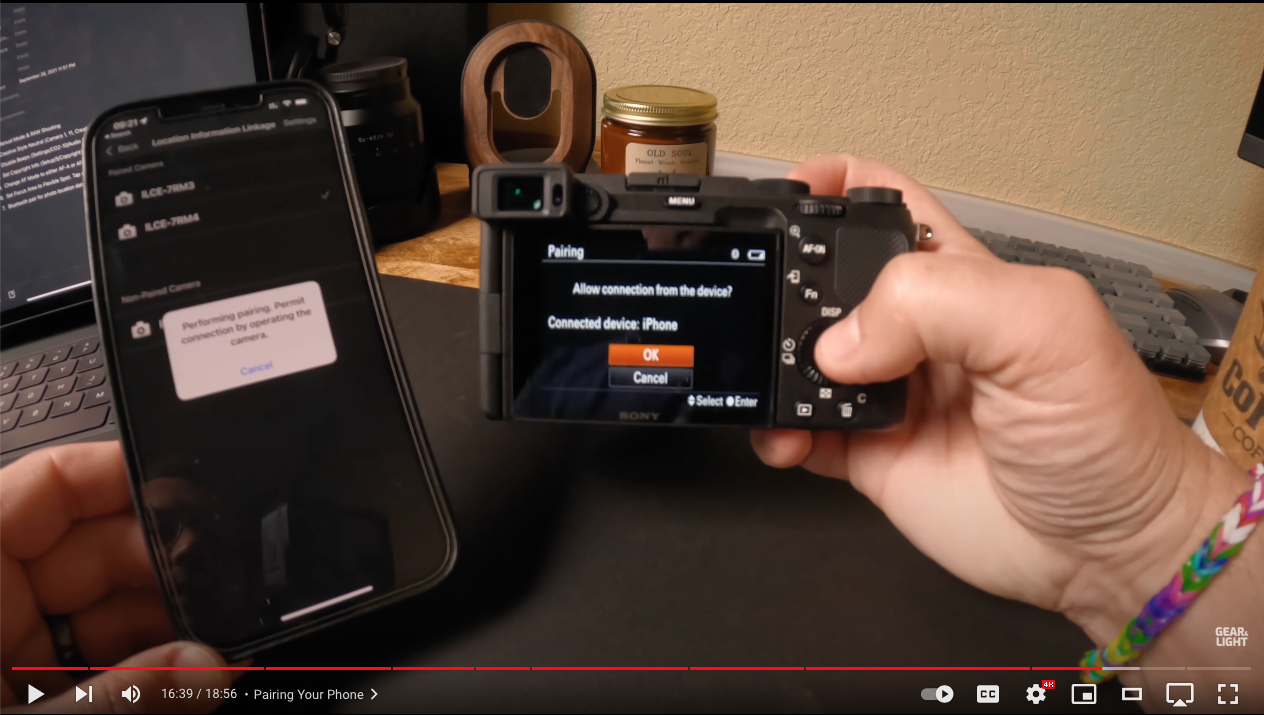
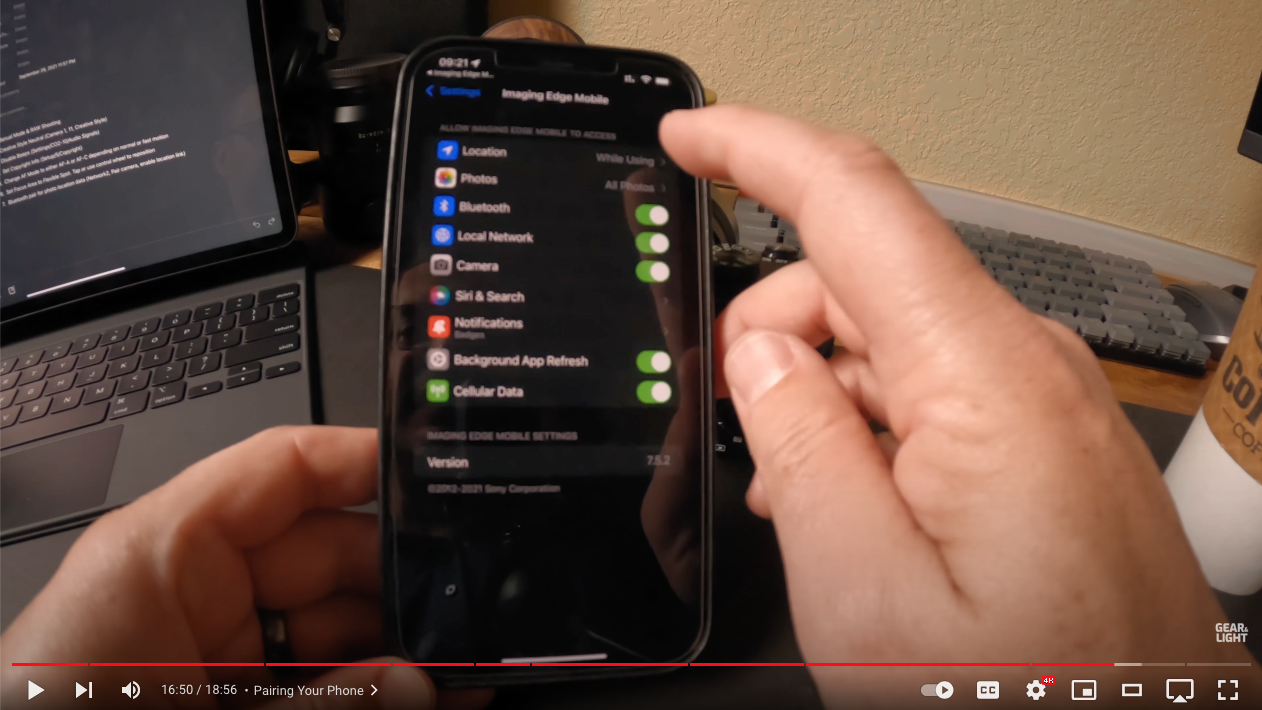
You’ll then need to approve the pair request on your phone, and set the location settings to, “always on,” in your phone settings.
Once your phone is paired, you’ll need to go back into your camera settings to the Location info Link set option.
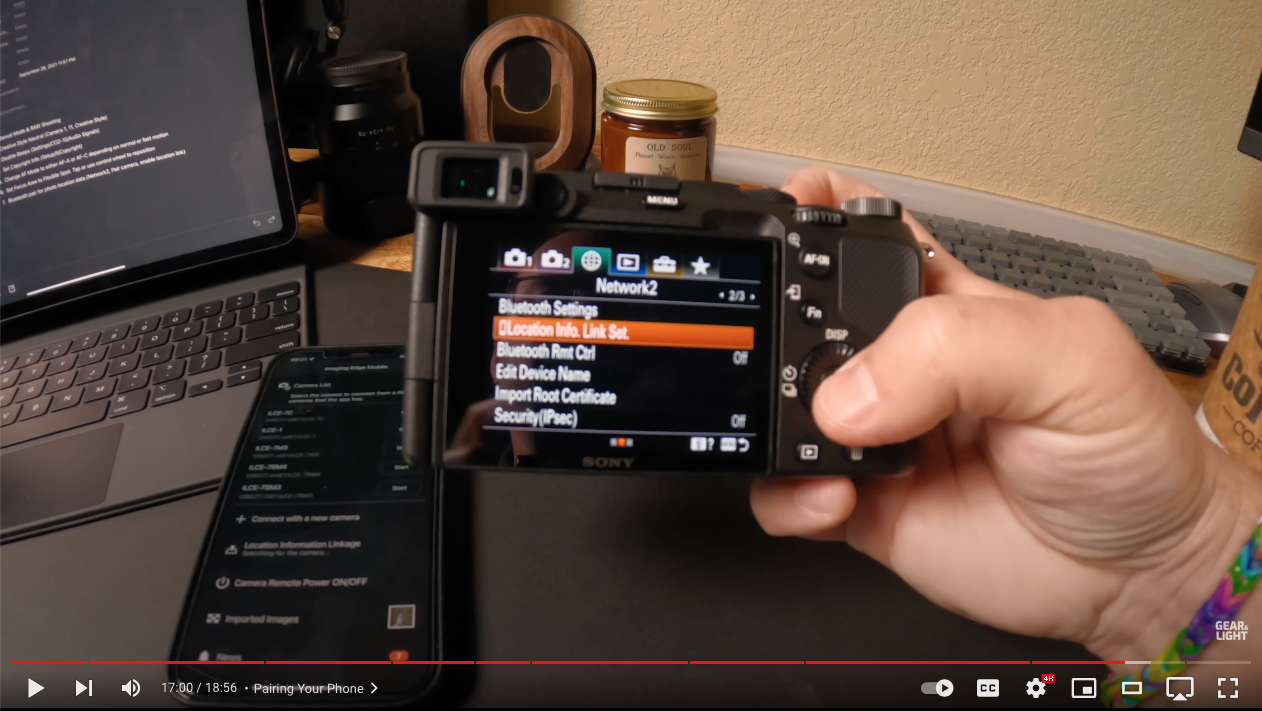
Set Location info Link to On. Your photos will now have information on your exact location whenever you take a photo. Having your photos geotagged will allow you to organize them in apps like Lightroom by location.
Final Thoughts
There’s a lot of information in this article, but mastering these settings will really help you take control of your a7C and really get the best possible images and video. If you’re interested in learning more about controlling your camera, don’t forget to check out my ditch auto course here: https://jerad.link/ditchautocourse
You can also see a variety of videos like this on the Gear and Light YouTube channel. Check out my review of the a7C:

